8 Things My Birthday Taught Me About Mental Health
It’s time to start talking about mental health and how anyone, especially creative entrepreneurs, can learn to live a mentally healthy lifestyle. If you’re feeling down, alone in your struggles, or just looking for a glimmer of light, I invite you to explore some of these tools and ideas, if you aren’t already, and know that you are not alone!
8 Things My Birthday Taught Me About Mental Health
Last week, I turned 28. To me, it was a milestone birthday because I’m no longer in my early twenties and I’m quickly approaching 30. It left me thinking things like,
“How the hell did it come so fast?”
“Is this what the rest of my life is going to be like?”
“What do I even have to show for this time?”
“Please make it stop!”
Turning 28 was kind of scary for me. I realized that my life, as it is today, is nothing close to what I thought it would be by the time I was 28. When I was younger, I always thought maybe I’d have a family by this age, maybe I’d own my own house, and maybe I’d have my own thriving business that I could live off of and not have to supplement it with other income.
Well… None of those things are the case right now. For a moment, it felt very disappointing. I felt like I had let myself down and completely failed at being an adult. I felt like I had failed and that my dreams were never going to come true.
Failed. Can you believe that? Despite accomplishing a fair amount of goals I had set out over the years, I still felt like I was nothing and would never be able to accomplish anything. Failed at 28.
It wasn’t until my sister sent me a text reminding me of the New Moon that was approaching (which happened to fall right on my birthday, May 15th) that I realized how ridiculous I was sounding. Turning 28 on the New Moon was the perfect time to reset my goals and intentions. I mean, I’ve always been a little melodramatic, but this was just down right stupid of me to think so negatively about my entire life.
I had let society’s imposed rules and limitations (some of which I don’t even subscribe to) get so deeply ingrained in my head that I had convinced myself I was a complete failure at age 28 for not meeting those preposterous expectations and should just give up. Not only had I let myself be fooled by these absurd “rules,” but the fact that I wasn’t achieving them was aggressively feeding into my anxiety and depression.
If you deal with anxiety and depression like I do, this might not sound too far off for you. It’s so easy to get sucked into that black hole of negativity when you feel like you can’t find the light at the end of the tunnel. It’s easy to feel like you haven’t accomplished anything when you have that voice in your head telling you it’s still not enough. The key to the puzzle is having the right tools to help pull yourself out of it so you can start to see the light.
Now...hear me out: I’m no anxiety, depression, or mental health expert. I haven’t cracked the code on how to get rid of it and I still deal with my anxieties on a daily basis. But I do feel like my journey with it has led me to finding keys, tools, and healthy coping mechanisms for me to mitigate the effects of it from time to time. It’s these very tools that helped me pull myself out of that “Help me, I’m 28 and my world is ending” negative bubble I felt trapped in.
If you’re feeling down, alone in your struggles, or just looking for a glimmer of light, I invite you to explore some of these tools and ideas, if you aren’t already, and know that you are not alone!
1. Take Care of #1
Like the legendary RuPaul always says, “If you can’t love yourself, how in the hell you gonna love somebody else?” This is SO important that I had to put it at the top of the list. Whenever I’m having a meltdown, 99% of the time, I’ve also been neglecting to taking care of myself and my personal needs. If you aren’t taking care of yourself, it’s easy for the rest of your life to feel like a hot mess. You have got to take care of #1!
Ask yourself what self care and self love means to you. Is it hitting the gym? Is it getting a mani/pedi? Is it getting 7-9 hours of sleep at night? Is it spending 10 minutes a day journaling? Is it going for a walk in nature? Whatever it is, you need to make sure you’re taking care of yourself. Take some time to write a list of things that you can do to take care of yourself on a daily, weekly, monthly, quarterly, and yearly basis. It can be as big as taking a vacation or as small as doing your hair differently.
2. Consider Therapy (or talking to someone)
It’s time to take away the stigmas that surround mental health and therapy. Seeing a therapist is not shameful or something to be embarrassed about. It is something to celebrate and be proud of yourself for taking the steps to explore! Therapy offers a safe space to learn new tools and healing techniques that can guide you towards living a happier, more fulfilled life.
I’m a HUGE advocate for therapy and taking care of your mental health. Right now, I actually see a therapist twice a week (one by myself and one with my partner) and can honestly say that it has changed my life for the better. I’ve been going to therapy on and off for the last 5 years and still feel like there is so much to explore and learn. It helps me in times when I’m feeling down and gives me someone to talk to who I know will listen and be impartial with their feedback.
I speak openly about going to therapy and highly recommend it to anyone who is considering it. Therapy provides you with a non-judgmental individual who helps show you the tools to make yourself a better person. You can learn to heal from past experiences, gain new communication techniques, or discover a new way of thinking. What’s not to love about that?
If you don’t feel ready to take the leap into therapy, that’s totally fine too! If you have an person in your life who is willing to hear you out and talk with you about your struggles, by all means, do that! It is healthier to talk with someone as opposed to keeping all your emotions bottled up only for them to erupt in an ugly manner one day. Talking to someone also helps us remember that we are not alone in these struggles or moments of hardship.
3. Know and Understand Your Triggers
This one seems pretty straightforward. If you can pinpoint what is triggering your anxieties and why, it might give you the space to heal them. This is a great exercise that you can do either alone, with a therapist, or with a safe person that you feel comfortable opening up with.
I usually turn to my journal or therapist for figuring out what is triggering me. Once I start to feel anxious, I ask myself what is happening and what is causing this. Usually writing lists of all the things that are running through my head help quiet the noise and get down to the issue. It helps to know what the triggers are in order to avoid them or learn to deal with them in a healthy manner. Once you can know and understand what your triggers are, it makes usually makes that “big bad monster” (aka your fears) not seem so real.
4. Make Time to Express Your Creative Energy
We are all creative, passionate beings and it’s important for us to remember to exercise those imaginative muscles as often as we can. It is my belief that our creative energy is something that needs to be expressed instead of suppressed. If this beautiful energy gets suppressed, it could manifest itself in unhealthy ways throughout our beings.
Take some time each week to express your creativity in whatever way you feel called to! Maybe you love painting, dancing, acting, writing, playing music, or visiting museums. Whatever it is, do something! Feel free to safely express and explore that creative energy in a way that brings you life. You don’t even need to share it with others, but do something to get that energy out of your system.
5. Make Small & Large Goals for Yourself
Nothing helps get me out of a funk more than knowing I am working towards a goal. If I don’t have a goal or if I feel like I’m not working to achieve something, I tend to have a meltdown and feel like I’m aimlessly floating around on this Earth. Having goals and dreams to work towards make this whole life experience more enjoyable after all.
Create goals for yourself--both big and small! Give yourself the permission to dream and dream big. Remarkable things rarely happen without visions, dreams, or goals in place to achieve them. Write them down, keep them close, and remind yourself of those goals as often as possible.
To that, I also want to say that it is totally ok if your goals change from time to time. Life changes, people change, circumstances change, so it’s perfectly fine for your goals and dreams to change too!
6. Do What Makes You Happy + Stop Comparing
I’m pretty much adding this in here to remind myself...
Life is short! Do whatever the hell it is that makes you happy and stop comparing yourself to other people because you don’t owe them a damn thing!
I think that sums it up, right?
But seriously, we could all afford to take this one to heart more often. I can’t count how many times I’ve been crippled by fear and anxiety and hesitated to create something out of fear that someone else has already done it and how could I do it better? UGH. Screw that thought train! I’m so sick of that negative self-destructive nonsense talk that we get smashed into our brains from a young age. It’s time we stop comparing ourselves to others and do what makes us blissfully happy in this life.
7. Forgive Yourself
I've gone through ups and downs of anxiety and depression for as long as I can remember. I have streaks of rough patches and streaks of fantastic patches. As a result, my creative work sometimes takes a hit because of these swings. I've become overwhelmed with self consciousness, anxiety, negativity, and thoughts of hopelessness in my work to the point that I just can't bring myself to doing anything (sometimes it's hard to even get out of bed). But through it all, there has been one thing that kept me going through those rough times: knowing that this, too, shall pass.
When I was younger, I came across a quote from Mick Jagger that said, "It's all right letting yourself go, as long as you can get yourself back."
While I'm sure the meaning behind this was probably not intended to refer to anxiety or depression at all, I sure took it that way. I mean, why not? It was a positive statement that helped me know, "Hey, just because you're feeling like a literal bag of poo right now doesn't mean you have to feel this way forever!" And it always helped me move forward towards that light and positivity.
I had to learn to forgive myself for taking the time and energy I needed to come back to myself. If you don't take away anything else from this post, please let it be this.
For so long, I would beat myself up and feel down for "not feeling myself." I would feel shitty because of my situation and then I would take it a step further and guilt/shame myself for feeling that way. Talk about an ugly, dark, spiral out of control. It's exhausting!
As soon as I started to feel like I was gaining control over my life again, I've also had to look myself in the mirror and say, "Hey...I forgive you. It's 100% OK to take time for YOU!" And you know what? That is what has helped me feel like I'm coming back to myself. Giving myself the space, time, and permission to get back to me.
Be more kind and gentle with yourself. Forgive yourself. Be unapologetically you.
8. Travel
Well you didn’t think I was going to leave this one out, did you? I believe that travel is one of the best medicines we can give ourselves to come out of those dark places and negative feelings. Traveling gets us out of our comfort zones and into new spaces that open our minds to exploring things we aren’t familiar with.
If you’re feeling stuck or down, consider traveling somewhere to get your mind, body, and soul moving. It doesn’t even have to be a far away exotic country. You could travel to the town next to yours for the afternoon to simply explore what they have to offer. Get creative with it and make it happen!
If you've made it to the end with me here, thank you. I appreciate you taking the time to read this post and continue to support me + The City Sidewalks. My intention for writing this wasn't to have anyone feeling sorry for me or pity me, but rather to express these vulnerable emotions and share how I'm getting through it in hopes that it might help one of you feel like you're not alone. It's people like you that make this awesome thing possible.
Love You All,
xx Ana
PS--I'd love to hear from you! Do you have any tips or tools that you use to deal with anxiety, depression, fear, guilt, shame, etc.? Please feel free to comment below!
Similar Posts for You
20 Travel Photography Tips to Start Taking Better Travel Photos
Have you taken a look at your travel photography skills to see where you can improve? If you've ever wondered how to take amazing photos of your vacations, use this post as your guide. Uncover 20 travel photography tips to start taking better travel photos on your next trip!
20 Travel Photography Tips to Start Taking Better Travel Photos
In today's digital age, travel photography is climbing the ranks as a top photography skill to have. People rely heavily on Instagram and other social media outlets to showcase their life and travels. Are you putting your best foot forward to stand out from the crowd? Use this post to uncover 20 travel photography tips to start taking better travel photos on your next trip!
Before Your Trip:
1. Know Your Camera
Spoiler Alert: You don't need an expensive professional camera to take great travel photos. With advancements in smartphone technology, the cameras on our phones are taking better and better photos to the point where you sometimes can't even tell the difference. That being said, if you do have a great DSLR, Mirrorless, or Point and Shoot Camera, get to know it as best as you can. Any time I get a new gadget, I really love watching YouTube tutorials to learn all the ins and outs of it.
The cameras that I recommend most for travel photography are the Sony RX100 MIII (great for on-the-go and vlogging) and the Sony a6000 (perfect substitute/replacement for the clunky DSLRs). There are tons of other accessories and gear that I recommend right here in the TCS Travel Shop.
2. Research Places You Want to See (Use Pinterest, Instagram, Google, Friends/Family)
If you fail to plan, you plan to fail. That sounds a little aggressive... I'm not saying you need a detailed minute-by-minute itinerary, but a general idea never hurt! Research a little bit ahead of time so you know some of the places you want to check out around your destination. My favorite tools to use for this are Pinterest, Instagram, Google, and just asking friends and family members for recommendations. Pinterest and Instagram can especially be a gold mine for beautiful photo locations since they are image heavy platforms. You can easily save your findings in both the platforms too!
3. Use Google Maps to Mark Your Spots
Once you have an idea of the places you might want to photograph, use a tool like Google Maps to plot them out. Doing this is a great way to plan a route of attack for all the places you want to see. You'll be able to estimate a transportation route and see how close/far each of your locations are from one another. I particularly love the "SAVE" feature on Google Maps that allows me to put a star or flag on a location that I want to remember.
4. Pack Wisely and Comfortably
First rule of traveling is to always travel as light as possible. You don't want to be lugging around heavy bags of camera equipment when you're on the go, so make sure to only pack the necessities. If for some reason you do need a ton of camera equipment (maybe you're shooting video in addition to your traditional still shots?), opt for a comfortable carrying case/backpack that will make it easier on your body. Don't forget comfortable shoes to walk around in as well! Check the TCS Travel Shop for my favorite things!
When You Arrive:
5. Get Up Early to Beat the Tourists
Nothing great ever comes easy. If you want truly stunning photos (and some pretty lighting), make sure to rise early to beat the tourists. If you're going to a hot spot--like the Brooklyn Bridge or Eiffel Tower--the earlier you arrive, the more likely you are to get a picture without hundreds of tourists crowding the photo. Plus, you'll avoid the harsh sunlight that usually starts to hit around late morning and early afternoon.
6. Stay Out Late to Beat the Tourists
But, if getting up early just really isn't your thing, consider staying out later into the evening when everyone else is wrapping up their evening. Evening shots and cityscapes can look really cool at dusk if you have the right camera equipment!
7. Have Patience
The key to capturing those unforgettable photos of popular landmarks, sites, or destinations is having patience. Trust me--I get it. I know how frustrating it can be to be crammed in with a bunch of annoying tourists who are taking up all the space in the area by taking photos with their gigantic iPads (PLEASE, SOMEONE TELL ME WHY OBNOXIOUS TOURISTS LOVE THIS SO MUCH?!?!). But if you just wait a couple of minutes, usually they will go away and the space will clear up for you. Have patience to get the right shot and angle because it will pay off!
8. Use Different Angles
Get creative with the angles and focus of your photos! An unexpected and unique perspective can be the difference between a good photo and a remarkable one. Take a step back, to the side, to the corner, to the front... Work all the angles!
9. Explore a Little
In case you didn't know, you don't always have to stick to the map. Sometimes the best discoveries are places that you didn't even know were on the map to begin with! If a side street looks enticing to you, explore it. If you see a cozy restaurant with amazing interior decor, stop in for a coffee or treat. I feel like it's always these unexpected places that we end up remember the most anyways!
General Photography Rules:
10. Use the Rule of Thirds
This well-known photography rule still holds true. When in doubt, make sure you're using the rule of thirds to set up your photo.
11. Play Around with Composition
Don't get too hung up on the rules of photography though. Play around with the composition of your photo. Put the subject in the middle, on the side, at the top, etc. See what works with different angles!
12. Fill the Frame AND Use the Frame
Find unique ways to fill your photo (i.e. don't have too much open space in the foreground if it's not necessary) or create a frame for the subject that you are photographing. This can be done by taking a good look at the surroundings of your subject before you shoot. Look through your viewfinder and try to find some hidden gems that will make your picture stand out!
13. Use Your Eyes to See Details
Before you step away from a shot, have a quick glance around to make sure you didn't miss anything. Maybe there's a charming little flower arrangement on the table at a cafe that would make the perfect accent to the photo. Or maybe the details on the door next to the building you were looking at has a really unique and intricate design. Make sure you don't miss out on these little things!
14. Have Awesome Editing Tools to Help Emphasize the Beauty
Editing is where the magic really happens. I'm not saying you have to go out and purchase thousands of dollars of editing software right now, but investing a little bit can certainly help. I use Adobe’s Creative Cloud Lightroom Photography Plan, which has been a game changer, and it’s only $9.99/month. To really kick things up a notch, I purchased and installed these 'Dreamy Presets' Lightroom Presets so that I can beautifully and effortlessly edit all of my photos with the click of a button. If you want to try them out, you can even use my discount code “THECITYSIDEWALKS10” for 10% off your order! I personally love the New York, Los Angeles, and Santorini presets.
15. Crop Your Photos
A good crop job can be the defining factor to a really amazing photo. When you're editing your photos, be on the lookout for angles and areas that you can crop out to really make the subject in the photo stand out. The foreground and sides are usually good places to start.
Bonus Tips to Remember:
16. Practice
As with any skill, the more you keep at it, the faster you'll improve. Practice taking photos as much as you can! You'll eventually start to learn and see what works vs. what doesn't. And don't get hard on yourself at first--the skill will develop the more you work on it!
17. Put the Camera Down...
This might be one of the most important tips (if not THE most important tip) on this list. Although this entire article is about how to take better travel photos, you need to remember to put the camera down once in awhile to be present in the moment and really appreciate where you are. I once met a woman who said that when she travels, she never puts her camera down and just looks at the pictures when she gets home. How depressing is that?! You're traveling to see and experience a place, so you should probably do exactly that! Put your camera down and be present to take in the moment.
18. ...But Keep it With You
That being said, you should always make sure you have a camera accessible in case something comes up that you want to capture! This is pretty easy nowadays since we have cameras on our phones and our phones are attached to our bodies. But having a small point and shoot camera never hurt either. I personally love my Sony RX 100 III as a backup to my iPhone camera.
19. Be Wise with Your Hotel Choice (if that's an option)
If you're flexible with your hotel choice and budget, it might not be a bad idea to pick one that is centrally located or one that has an awesome balcony/view! It's a convenient way to be able to take some cool shots of the city.
20. Always Have Backup
The worst thing that could happen for your photography is getting stuck with a dead battery, lost photos, or a full memory card. ALWAYS bring these things with you when you travel:
Extra Batteries
Extra Power or Charging Cords
Extra Chargers
An External Hard Drive
Extra Memory Cards
A Convenient Case to Carry Everything
The TCS Travel Shop has all my best recommendations for these products!
What are other travel photography tips you use to take great travel photos? Comment below with more pointers!
Shop this post
This page may include affiliate links, which comes at absolutely no cost to you. As an affiliate partner to such websites, including Amazon Associates, I earn from qualifying purchases. All opinions are my own.
Similar Posts For YOu
How to Plan Your Trip Like a Travel Editor: 8 Tips to Find Inspiration to Plan Your Next Vacation
Feeling stuck about where to travel next or what to do when you get there? Use these 8 travel tips to uncover how travel editors and bloggers plan their trips and vacations. Find out how to get travel inspiration, plan a flawless itinerary, and really enjoy your next trip by using these travel tools and tips!
How to Plan Your Trip Like a Travel Editor: 8 Tips to Find Inspiration to Plan Your Next Vacation
You’ve got some money burning a hole in your pocket and you know you want to travel, but you’re not sure exactly where to go. —OR— You know where you want to go, but you’re not sure what to do once you’re there. Have these things ever happened to you?
Even as a travel blogger, these things still happen to me almost every time I’m planning a trip. Sometimes I get stuck on deciding where I want to go or how I want to spend my time. Other times, I just need inspiration on what to do or where to eat when I’m there. Even travel professionals still have to do research to find inspiration and plan a trip!
If you’re looking for a bit of travel inspiration on how to plan and really enjoy your next trip, use these travel tips to uncover how the professionals do it!
1. Search Social Media
Social media is so much more than a sea of selfies and baby pictures. It can actually be put to good use as a handy travel planner when you’re looking for inspiration.
Since photos can be a great driver for spark and intrigue, I recommend checking out Instagram first. If you aren’t already, start following some travel accounts in order to gain some insight and inspiration about where you want to go next. It’s a travel blogger's job to get you to want to visit a destination, so search the Insta world for some great accounts to follow!
If you’re browsing around Instagram, you can use things like the Geotag feature, Hashtags, and other searches to find things to do in your dream destination. Searching the pictures and accounts on these pages can really help drive up interest.
I personally love using Instagram’s “save this post” feature to be able to group all the inspiration photos I want together. I even have different albums for general travel and more specific ones if I know where I’m going and want to save a collection of images to remember when I’m there.
You can also use other platforms like Snapchat, YouTube, Twitter, or Facebook to find inspiration, but I tend to think Instagram is the king of travel content for this purpose. PS—you can follow me on my Instagram for your weekly dose of travel inspo right here: @thecitysidewalks
2. Asking “for a Friend”
There’s really no better way to get travel inspiration and ideas than to ask someone you know and trust. Ask your friends, family, or colleagues about their recent trips. See where they have been and/or places that they would recommend going.
If you already know where you are going, ask people for recommendations on places to go once you’re there! Bonus points if you can ask someone who lives there or has lived there. It’s a great way to find hidden gems or spots that only locals would know about.
3. Browse Travel Blogs
Travel blogs are such a great resource for finding what to do, where to eat, where to stay, and other helpful tips for destinations all over the world! In my opinion, compared to other travel resources (like asking your hotel concierge), travel blogs tend to be much more genuine and personable.
Travel blogs can also be a great place to find curated city guides with free tips and information about things to do. If you’re looking for a unique experience, you’re also more likely to find off-the-beaten-path tips on personal travel blogs instead of your standard travel book.
If you haven’t found a great travel blog that you like to frequently follow, a simple Google search would do the trick! Or, use the next step for searching Pinterest.
RELATED: The City Sidewalks City Guides
4. Get on Pinterest
LISTEN UP, EVERYONE! This tool is a GOLD MINE of travel information. Pinterest is the #1 most underrated tool to find travel inspiration. There is so much more than recipes and DIY home decor tips on here. If you’re not using it for travel, you’re falling behind.
If you have an upcoming trip planned, or you’re just looking for some general inspiration, get onto Pinterest and start using it as your personal travel planner right now. I’m obsessed with Pinterest and use it all the time when I’m planning trips. You can find curated city guides, tips about things to do and where to eat, and even photos of cool places that you can visit or see. It’s a travel-planning dream!
Create and use your own boards to pin articles, photos, or other tips so you can keep everything organized. You can create a board specific for your upcoming destination, or have a general inspiration board for anything.
5. Keep a Travel Journal, Wish List, or Excel Spreadsheet
I’m in my head a lot, so I tend to need a lot of organization skills to keep everything compartmentalized and in order (where my other Type A personalities at?!). These habits have really come in handy when I start planning new adventures.
In the past, I’ve kept travel journals that have lists of all the places I wanted to go. I’ve had wish lists of cities or streets I wanted to see. I’ve even gone as far as organizing the massive (and endless) list of restaurants I want to eat at in NYC and Chicago into an Excel Spreadsheet.
If you’re Type A like me—or you just want a new way to keep your travel inspiration organized—consider using these tricks. It helps keep everything in one spot so that you know where to look when you’re in search of some guidance.
RELATED: 10 Travel Books to Put on Your Coffee Table Now
6. Explore Deals on These Websites
If I have no clue where to travel next, the first thing I do is consult a handful of airline websites to see what deals are out there. I don’t even know how it’s possible, but these websites have incredible deals all the time that allow you to travel anywhere in the world on your own budget. These are my favorite ones:
- Skyscanner
- Momondo
- Secret Flying (great newsletter, too!)
- Skiplagged
- FlightHub
RELATED: You can check out my full list of recommended travel planning resources right here!
7. Save Things to Google Maps
Another organization tool for my Type A people! If you didn’t already know, Google Maps has a way of saving places that you want to go (or places you have been) with a little flag or star to keep for later. I use this on a daily basis—especially in New York where the restaurant choices are endless.
If someone gives you a tip on where to eat dinner in Paris, or you see a cool spot you want to return later when you’re walking through Brooklyn, use Google Maps to save the location!
To save a location, open Google Maps > find the place on the map > select the establishment > click “SAVE” > and “Save in your lists.” It’s super easy! It’s better than having a list that you forgot on your computer and it gives you the map and directions for reference.
8. Check TripAdvisor or Yelp
Tools like TripAdvisor and Yelp can be your best friends when planning where eat or what to do once you’re in a destination. You can end up finding some great restaurants or activities using these apps. I particularly love that you can narrow things down by budget and location.
A word to the wise: Take these apps and their reviews with the grain of salt. I’ve been to restaurants that have only a 3 star rating on Yelp, but they are literally some of the BEST places to go in the city. Sometimes people can be extremely petty with their reviews (like deducting a star because they didn’t have Pepsi vs. Coke) or leave scathing comments because of one bad, uncommon experience. Take all these reviews with the grain of salt.
BONUS: TripAdvisor also has amazing lists of best destinations and hotels to visit that are broken down into tons of categories. If you’re still searching for where to go or where to stay, this can be really helpful to narrow things down!
What kind of planning tools do you use when you travel? Are they some of the things on this list? Comment below with more travel inspiration or advice!
This post may include affiliate links, which comes at absolutely no cost to you. All proceeds go directly back into maintaining this website and making it better for you. All opinions are my own.
Similar Posts For You
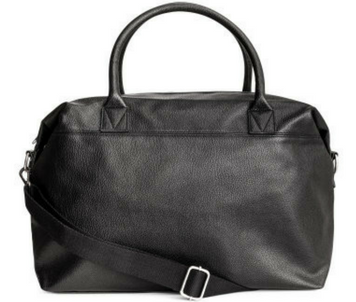
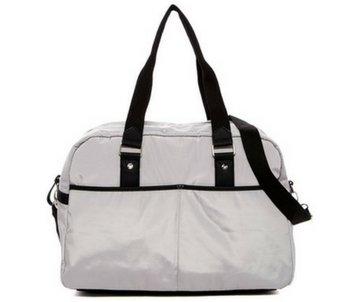
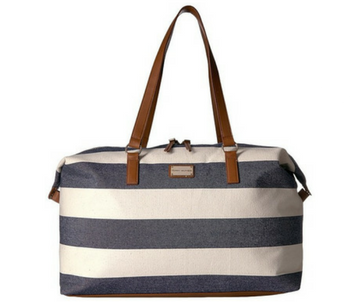
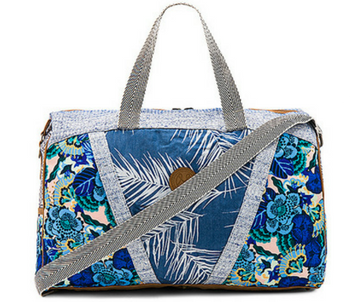
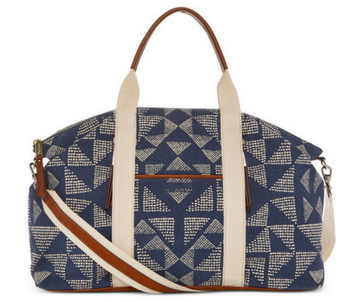
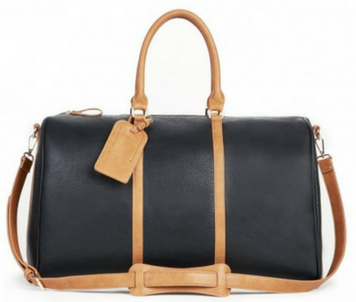
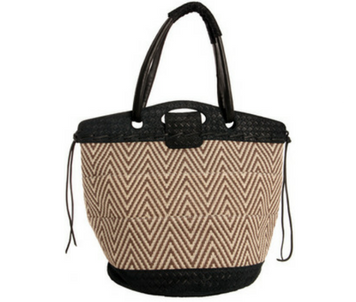
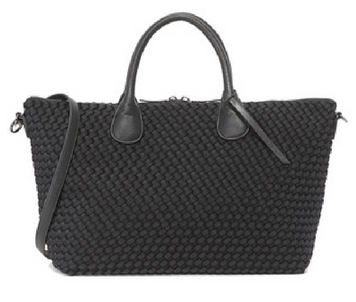
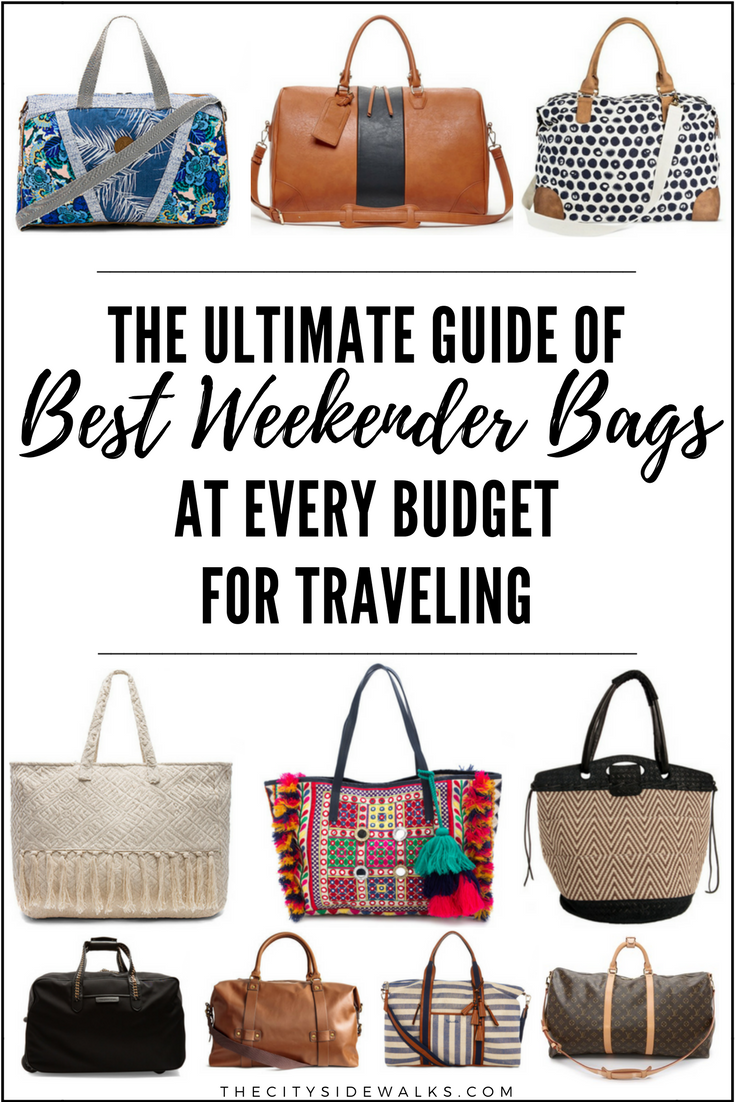
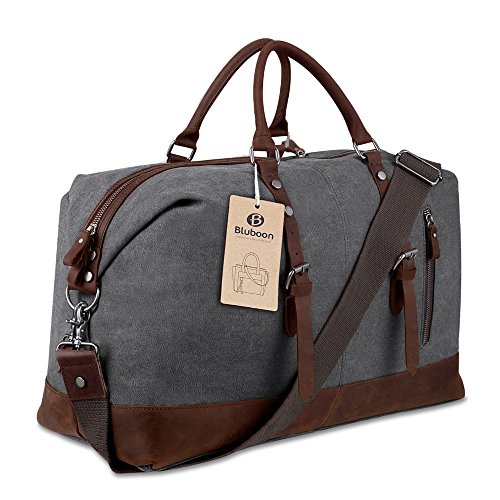
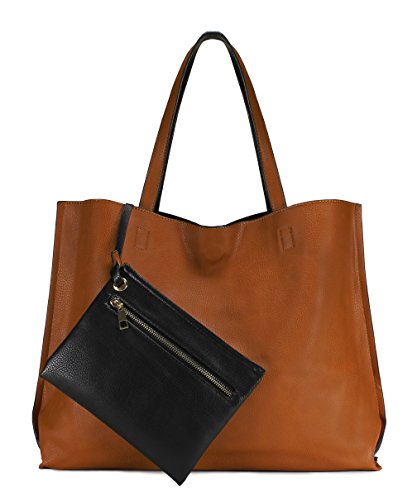
The Ultimate Guide of Best Weekender Bags at Every Budget for Travel
The best accessory for a weekend getaway (besides some statement sunnies and your camera) is a chic, reliable weekender bag. But your travel bag doesn't need to break the bank--there are great styles at every budget! Shop these weekender bags at every budget for travel to find the best one for your upcoming trip!
The Ultimate Guide of Best Weekender Bags at Every Budget for Travel
Budget Friendly: Under $75
Moderate: $75-200
Luxury: $200-400
Splurge Worthy: $400+
BONUS: Extra Accessories You Need in Your Bag
Want to browse more travel gear and accessories? Head to the TCS Travel Shop right now!
Disclosure: Please be aware that prices and availability of products listed are subject to change at any time due to retailer demand and availability. Every item in this post is a product that I personally use and/or highly recommend to TCS readers. This page may include affiliate links, which comes at absolutely no cost to you. As an affiliate partner to such websites, including Amazon Associates, I earn from qualifying purchases. All opinions are my own.
Similar Posts for You
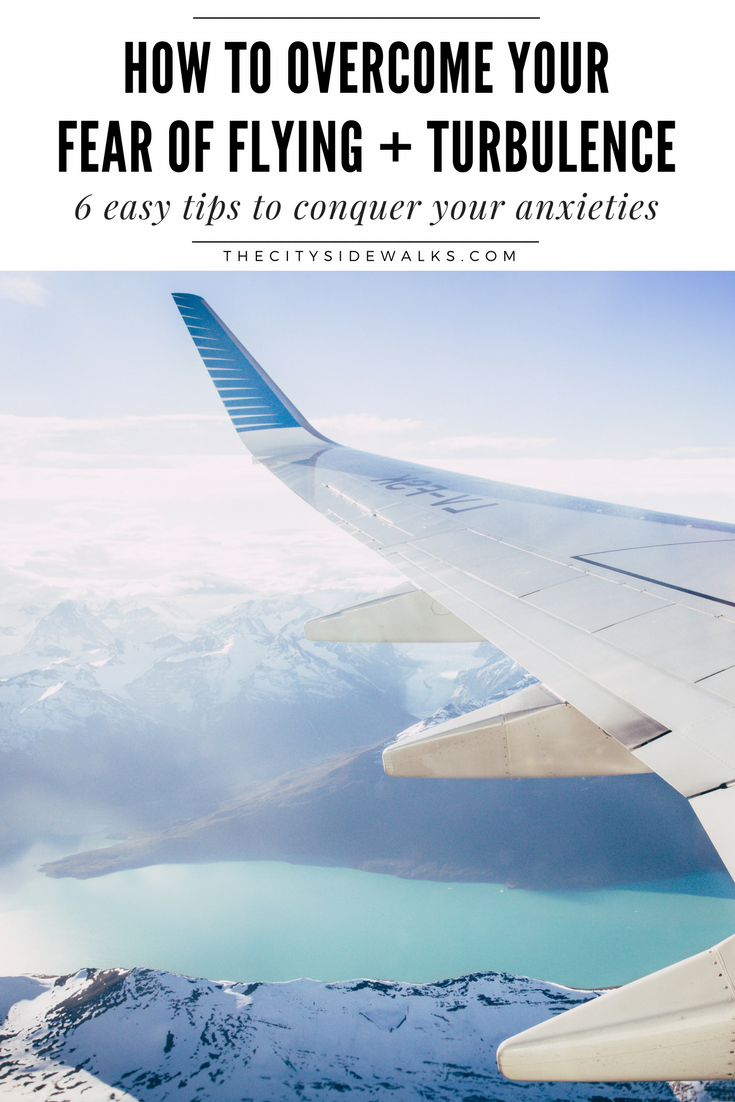
How to Overcome Your Fear of Flying: 6 Easy Tips to Conquer Your Anxieties
Confession Time: I'm a travel blogger who is afraid of flying. For real. Luckily, after years of practice, I've come up with an easy system for how to overcome this fear of flying every time I step onto an airplane. And now, I'm sharing my tips with you! If you're like me and you hate the feeling of turbulence, check out these 6 easy tips to conquer your fears and anxieties of flying.
How to Overcome Your Fear of Flying: 6 Easy Tips to Conquer Your Anxieties
“Oh shit... Here it goes again. Just try to breathe. Just breathe. Try to stay calm.”
My fists white knuckle into the armrests as my entire upper body is folded over my lap with my head in between my legs. My eyes are closed tight and I can feel the fear and pain begin to wash over my body. My heart is pounding and feels like it’s beating out of my chest. The fear is beginning to take over and every millimeter of movement starts to feel like imminent death.
“This is it. I can’t hold it in anymore. I don’t care what people think anymore.” I continue think to myself. “No, Ana! JUST BREATHE. YOU GOT THIS! BREATHE. IN. OUT.” It was like I was stuck in the middle of a game my brain was playing where it was being both the angel and the devil and I didn’t know which one to listen to.
But I couldn’t hold it in anymore. The fear had won this time.
“Oh fuck... Here come the tears...” I think to myself as an uncontrollable stream of “Kim Kardashian ugly cry” sized tears and sobs start wailing out of me. I don’t even care that people are staring at this point. I can’t stop it. It won’t stop. My mind has gone into complete survival mode and I’ve abandoned all sense of reasoning and logic to make myself stop crying. The panic attack has set in.
It was my first full-fledged panic attack on an airplane thanks to my fear of flying and turbulence. If it wasn’t for the kind woman sitting next to me in 7B who felt so bad that she held my hand and rubbed my back as I was sobbing, I don’t know what I would’ve done or how much longer it would have lasted. Although, we did have a good laugh once we landed safely and she asked me what I did for a living. “I’m a travel blogger,” I said timidly. The sheer irony of the person who travels for a living having an epic meltdown in the air—something that most people think I’d be used to by now—was pretty comical after the moment ended.
But it’s true. And now I’m letting my fears be known to the world.
My name is Ana Dominguez and I have a fear of flying.
It's shocking for a person who travels so much—I know.
Uttering the words (and even writing them) is such a bizarre thing to me, though, because I wasn’t always like this. I used to get such a thrill from the feeling of taking off or being in the air. But somewhere along the way, that feeling turned sour.
Maybe Hollywood is to blame for making movies about aircraft tragedies. Maybe airline corporations are to blame for making their cabins feel increasingly more claustrophobic. Maybe the media is to blame for broadcasting every tiny detail that goes wrong with/on airplanes these days. Maybe it’s just getting older and being more aware of the perils of everyday life. I don’t really know what it was, but something switched in my head within the last 10 years that triggered my fear of flying and turbulence (or rather the fear of falling to my death from the sky) that still affects me every single time I step foot on a plane.
Truth be told, I’ve actually gotten much better at coping with my fear (and am even writing this article while sitting on a plane that has already had a couple of uncomfortable bumps), which was one of my intentions of writing this. I’m hoping that by vocalizing this fear and sharing how I’ve been able to cope with it, it will work as some sort of therapeutic release in the sense that I’m letting the energy go while also helping others overcome their fears. Plus, now you can have someone to relate to!
Which brings me to my second intention of writing this article: I want to share all of the methods and things that I’ve done over the last couple of years to learn how to conquer this fear. And, no, I didn’t spend thousands of dollars on hypnosis (although that would be pretty cool, now that I think about it...). These 6 tips are all simple, little things that you can start doing today and even use on your next trip to overcome your fear of flying!
1. Breathe like a Yogi
If you’ve ever taken a human biology class, a yoga class, or even learned about basic physiology, you’ve probably heard all about the importance of breathing and receiving oxygen to the brain. One of the top reasons why our brains start to go into panic mode whenever they do is because they aren’t receiving enough oxygen to properly operate and function as they would if things were calm. That’s why it’s so important to remember to breathe whenever you’re going through something stressful—whether it’s emotional, mental, or physical.
For me, learning how to meditate (which, thanks to technology, can be done by watching a single YouTube video) and properly breathe has really come in handy during my moments of flight panic.
But did you catch what I just said there? *PROPERLY* breathe. Not just regular breathing, but expert breathing. It’s more than just taking a breath in and out. There are actually ways for you to do it so that you can calm yourself down and get the most oxygen possible. Here are my two favorite ways:
- Belly Breathing:
Take a deep breath in and a deep breath out right now. If your shoulders move up and down while you’re doing it, you’re doing it wrong. To really get the most oxygen while breathing, focus on breathing in deep through the belly and visualize your diaphragm and stomach filling up with as much air as you can possibly take in. Your shoulders shouldn’t be moving up and down and your upper body shouldn’t be doing much either. When you breathe out, let out every bit of air as if you were a balloon becoming completely deflated. Now do this to counts. Breathe in for 3-5 counts and breathe out for 3-5 counts. Slowing down the breath like this will help the flow of oxygen in your system and get you more relaxed.
- Single Nostril Breathing:
This is a great technique I learned from a friend of mine who also deals with anxieties and panic attacks. I love this one because it forces you to focus on the breathing technique instead of your fears or anxieties. You’re going to use the thumb, index finger, and middle finger of one of your hands for this. Choose a hand and place the index finger directly above the bridge of your nose on your third eye. Place the thumb on one nostril to cover it up and breath deeply through the other nostril that is open. Once you have breathed in all the air you can through that open nostril, use your middle finger to cover up the nostril that was just open and breathe out through the nostril that was just closed. Now breathe in through that same nostril, close it with the thumb, and breathe out the other nostril. Keep alternating and repeat this until you feel like you have reached a steady pace of breathing or your anxiety has subsided. Like I said, I love this one because it helps me take my mind off of what’s going on around me.
I can’t even stress enough how important breathing is when you’re feeling panicked on a flight (or any situation, for that matter). I know I’m guilty of forgetting to do this sometimes, but breathing properly has definitely come in handy more times than I could count.
Bonus: If you really want to step up your relaxation game, you can buy a small bottle of lavender oil to dab on your wrists or put inside your palms to breathe in while you’re practicing these exercises. I always carry a small bottle with me in my carry-on bag just in case I need it.
2. Have a designated meditation or calming playlist ready to go on your phone
In addition to the breathing techniques, I’ve learned that having a soothing playlist to listen to can really help put you in the zone and focus your mind on calming down.
I personally love using Spotify and have even created my own designated playlist of meditation music to listen to whenever I start feeling anxious. It helps put me at ease and tells my brain, “It’s time to chill out.” But you don’t necessarily have to use meditation music. Whatever genre of music works to put you in that relaxation mood, use it on your own personal playlist.
3. BOSE. NOISE. CANCELING. HEADPHONES.
I know that I said all of these tips were going to be cheap and easy enough to start doing now, but this one is the exception to the rule. But I promise it’s an exception for a very good reason.
For me, one of the biggest sources of my anxiety on planes is the noise that comes from the aircraft bumping and shaking (screaming children don’t help either...). You know what I’m talking about, right? It’s those creaky, bumpy sounds that happen when turbulence starts to set in. Yep, I can’t stand it. It makes me feel like death is upon me. The only solution to this was to start listening to calming music (as mentioned in #2) to put me at ease.
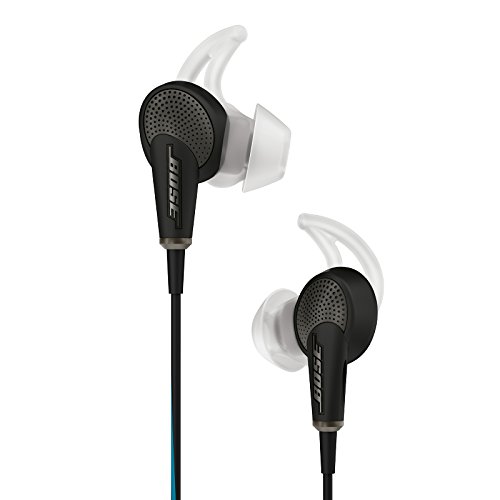
I used to use regular headphones on flights like most people and they worked fine. But, a couple years ago on my birthday, my mom got me quite possibly the best gift ever for my flying anxiety: a pair of Bose Noise Canceling Earbuds.
OH, BUDDY, DID THESE DO THE TRICK!
Popping those babies in took me to a whole new world. As soon as I turned them on and started my meditation playlist, I was immediately transported to my own personal oasis away from all the noise, fears, and anxieties of traveling. It was like a switch had flipped and I wasn’t as nervous anymore since I couldn’t hear the noises of the aircraft.
Sure, the bumps of turbulence are still there; but it feels a wholeeee lot different when you can’t actually hear what’s going on. Kinda takes the edge off, if you will. I swear by these headphones and 100% recommend them (or any type of noise cancelling headphones) for people who have trouble with flying.
FYI—if you can’t splurge on headphones, you can also just get a nice pair of earplugs. I personally prefer and recommend the headphones because you can put on soothing music, but whatever works for you!
4. Watch the flight attendants
I learned this tip from a flight attendant who was sitting next to me on another nail-biting turbulence tunnel. He saw how nervous I was getting with every shake and bump and assured me that everything was totally fine. He said something along the lines of, “Look, we do this multiple times a day, every day. We can tell when the bumps are fine and when they are REALLY not fine. 98% of the time, it’s totally fine and nothing to worry about.”
He suggested to me that any time I start to feel nervous when things get a little shaky to just take cues from the flight attendants. Look up to find them and see how they are reacting. Are they panicking? No? Ok, then you shouldn’t either. You’ll be able to tell how things are really going based on how chill (or not chill) they are. Most of the time, when the pilot tells everyone to get back to their seats, it’s just a precautionary measure. You can even see how little it affects the flight attendants as they’re Instagramming or chatting it up with their co-workers.
5. Talk to a pilot
I know this one is a little unconventional, but if you ever get the chance to talk to a pilot about the science of flying, do it. I once struck up a conversation with a pilot that I met on the streets of London and we started talking about turbulence over the Atlantic Ocean. As soon as he started explaining exactly what turbulence was and how safe we actually were in that flying steel bird, it sorta put me at ease. It’s almost like the mystery of what was going on and the fear that we were going to fall out of the sky because of turbulence had melted away.
My new friend explained to me that these massive aircrafts are built to withstand tons of turbulence, which is a really just a strong gust of wind when you think about it. Often times, when you feel like the plane just dropped hundreds of feet, that’s just your headspace getting in the way; it’s actually only a couple of inches or feet, which is nothing in the grand scheme of things. He also explained how it’s literally impossible to fall out of the sky when you’re flying and that you’re safer in a plane than you are in a car.
I’m telling you—learning a little bit of the science behind flying helped me a lot. For instance, did you know that an airplane could fly safely with only one engine and land without any? Incredible! All these facts shed some light on the scary stuff and made me better understand what was really happening. Maybe learning how to fly or becoming a pilot should be my next step in overcoming my fears...
6. Reframe your thought process
Thoughts are EVERYTHING! The power of positive thinking can really come in handy for every situation, even flying. If you can start to tell yourself that everything is fine and you’re totally safe, eventually your brain will start to believe it. Think positive thoughts and reframe your thought process into something better.
Another travel friend of mine said that any time she starts to feel the plane get shaky, she just thinks of it as a little, harmless road bump. One time she told me, “Well, what’s the worst that can happen? A drink falls over? Meh! That’s nothing.” So that’s what she has taught her brain to think: The worst thing that will happen is a drink will fall over, which you can easily clean up. It’s much better to fill your head with less catastrophic outcomes like this one.
What about the booze?
I don’t recommend this every time, but sometimes a cocktail or a glass of wine can definitely help to relax the nerves a bit. This needs to be done with caution, though, because too much alcohol can dehydrate you and reap horrors for your complexion and system. It can even negatively trigger anxiety since alcohol is a depressant. But I’d be a hypocrite if I didn’t say that I’ve had a couple glasses of Sauvignon Blanc to calm down from the panic of flying...
No mention of Xanax or pills, either?
If this method works for you, that’s great! There are some people who actually really need some kind of substance(s) to calm the nerves, which is totally fine as long as your doctor recommends it and is supervising your dosage. I don’t personally subscribe to this method of relaxation because I try to be as homeopathic with my medication and remedies as possible, but I’m not against it. I just prefer other ways of easing the tension.
Like I said earlier, all of these methods and practices are things that I’ve learned over the last few years of traveling in order to deal with my anxieties. If you have issues with flying, use one, none, or all of them if you’d like! The key here is to acknowledge and confront your fears in a healthy manner and figure out what works best for you.
Do you have anxieties or fears of flying? What things do you do to help or overcome those fears? Let me know what you thinkin the comments!
Shop This Post
Similar Posts For You
8 Travel Beauty Tips: How to Look Fresh After a Long Haul Flight
One of the worst things about travel is when you walk off of a long haul flight feeling completely drab and disgusting. Luckily, there are a few beauty remedies that you can start using to feel completely fresh faced every time you step off a flight. Use these 8 travel beauty tips to start looking and feeling your best after any flight.
8 Travel Beauty Tips: How to Look Fresh After a Long Haul Flight
One of the worst things about travel (besides the dreaded act of packing) is when you walk off of a long haul flight feeling completely drab and disgusting. Your skin is dry, your hair is a mess, and you just feel blah.
Luckily, there are a few beauty remedies that you can start using to feel completely fresh faced every time you step off a flight. Use these 8 travel beauty tips to start looking and feeling your best after any flight.
1. Pack the Essentials in Your Carry-On
First thing will be to make sure you have all of your beauty essentials within arms reach. Make sure to pack your carry-on with all the essentials you'll need so you don't have to rummage around for them. I'll go over some of my essential items in the list below, but the best thing is to make sure you have a good bag to pack them all in. You can also see my list of 10 Beauty Products to Always Travel With.
RELATED: The Ultimate Guide of Best Weekender Bags at Every Budget for Travel
2. Hold Off on the Makeup (and maybe the contact lenses)
If your flight is more than 3 hours and you really want to feel your best when you land, it's probably best to skip on the makeup before you take off. The air in the cabin is typically pretty dry and harsh, so it's best to have a fresh face to start off with. If you really need some color, opt for the bare minimum like tinted moisturizer and a touch of concealer.
If you wear contact lenses, it can be really helpful to take them out for long haul and overnight flights to let your eyes breathe. Have your glasses and maybe some moisturizing eye drops handy to soothe your eyes before you put your lenses back in.
3. For Ladies: Prepare to Keep Fresh...Ahem...Down There
Alright ladies... How many beauty lists have we seen that talk about beauty products to travel with? Tons (Hell, I even have one)! But it seems like they all fail to mention how you can keep fresh around your lady parts. The best thing to keep handy in your bag are some panty liners, disposable cleansing cloths, and an extra change of underwear. My mom passed on this trick to me and now I never travel without any of these things in my bag. It helps to make sure you feel fresh and clean once you land, even if you can't have a shower for a while.
4. Hydrate, Moisturize, Hydrate, Repeat
The best way to step off that airplane looking fresh faced is to hydrate your body and skin as frequently as possible throughout your flight. You can do this by drinking tons of water, putting moisturizer on your face, using a sheet mask, lotioning up your hands, using lip balm, and drinking more water.
5. Skip the Salt, Coffee, and Booze
The worst thing you can do for your complexion before and during a flight is overload on salty foods and alcohol. The salt causes major bloat, which doesn't help when you're sitting for long periods of time, and the alcohol and coffee will just dry out your skin and system. If possible, opt for healthier snack choices and drink plenty of water. The more you replenish with water, the brighter your skin will look when you arrive to your destination.
6. Rest Up Comfortably
There are a few ways that you can make sure you feel totally comfortable on a flight. First, make sure you're wearing comfortable clothes (leggings, flowy tops, scarves, maxi dresses, flats, etc.) to let your skin breathe. Second, bring along a cozy blanket, a silky eye mask, and a neck pillow. A pair of earplugs or noise canceling headphones never hurt either...
7. Freshen Up Before Landing
When the flight attendants give the "final stretch" announcement before landing, that's a perfect time to start freshening up. Carry a little travel kit that has all of your essentials in it so you can grab it and head to the lavatory to take care of business. In my travel kit, I like to keep a small travel toothbrush/toothpaste, moisturizer, thermal water misting spray, highlight or concealer, a blush/bronzer kit, mascara, and my feminine care (see above #3).
8. Give Your Hair a Lift Once You Land
The final step to looking fresh after a long haul flight is to give your hair a little oomph. A little dry shampoo and some hair spray can really work wonders to make you look like you're ready to step out in style. Carrying this and a travel size hair brush will give you the perfect volume you need.
With these travel beauty tips and products, you're sure to walk off your long haul flight looking as fresh and as radiant as ever!
What are your favorite beauty tips to look fresh after a long haul flight? Comment below with more tips!
This page may include affiliate links, which comes at absolutely no cost to you. As an affiliate partner to such websites, including Amazon Associates, I earn from qualifying purchases. All opinions are my own.
Similar Post For You
Global Eats: Steaks with Sweet Potato Hash Browns and Chimichurri Recipe
This month's Global Eats Steak Recipe is going to bring the tastes and flavors of Argentina right to you in less than 30 minutes. Try this steak, sweet potato hash, and chimichurri recipe at home for a date night this week!
Global Eats: Steaks with Sweet Potato Hash Browns and Chimichurri Recipe
Food and travel go hand in hand like a beautiful love story that I can't help but getting in the middle of. Cuisine is a universal language of culture and travel. It is quite literally how we "taste" the places we are visiting and get to experience them on a deeper level.
So, in an effort to encourage you to bring exotic tastes home with you when you're not traveling, we're back with another Global Eats recipe! This recipe, which is brought to us by Sun Basket, explores the flavors and tastes of Argentina. And is there anything more Argentinian than a delicious steak and chimichurri recipe? This recipe makes for a perfect dinner for two, but can easily be altered with some scrambled eggs to create a delectable brunch dish.
Make sure to scroll to the bottom for an exclusive Sun Basket discount for TCS readers!
I got this recipe courtesy of Sun Basket in my Globetrotter Collection. In case you're not familiar with Sun Basket, they are an incredible company that delivers healthy, weekly meals and recipes that come from organic and sustainably sourced seasonal ingredients. Chef Justine Kelly and her team created this tasty (and Paleo-friendly) recipe as a nod to the legendary street food of Bangkok.
I really love Sun Basket because they offer a wide variety of healthy options (Gluten-free, Paleo, and Vegetarian) with their menu selections and they are extremely affordable for the value you're getting (around $11 per meal). It's like someone does the grocery shopping and meal planning for you--AND also gets you the freshest ingredients--without you even having to leave your couch. WIN-WIN! So let's get started!
Steaks with Sweet Potato Hash Browns and Chimichurri
Makes 2 Servings // 710 Calories Per Serving // 30 Minutes
Paleo - Gluten Free - Dairy Free - Soy Free
Ingredients:
- Two 6-ounce top sirloin steaks
- Steak spice rub (sweet smoked paprika - garlic powder)
- ¾ pound sweet potatoes
- 1 red bell pepper
- 1 to 2 shallots
- Peeled fresh garlic
- Hash brown seasoning (cumin - dried oregano - coriander)
- 1 lime
- Fresh cilantro
- Fresh mint
Directions:
1. Prep the steaks
- Heat the oven to 200°F.
- Pat the steaks dry with a paper towel; season generously with salt and pepper.
- On a shallow dish or plate, rub the steaks all over with the steak spice rub. Let stand while you prepare the sweet potato hash.
2. Prep the hash browns; cook the potatoes
- Trim the ends from the sweet potatoes; cut the potatoes into ¼-inch cubes.
- Remove the ribs and seeds from the bell pepper; finely chop the pepper.
- Peel and finely chop the shallot.
- Finely chop enough garlic to measure 1½ teaspoons.
- In a pan over medium-high heat, warm 2 tablespoons oil until hot but not smoking. Add the sweet potatoes, season with salt and pepper, and cook, stirring occasionally, until starting to brown, 3 to 4 minutes.
3. Finish the hash browns
- Add the bell pepper, shallots, hash brown seasoning, and half the garlic to the sweet potatoes.
- Season with a pinch of salt and pepper.
- Cook over medium-high heat until the shallots are soft for about 2 to 3 minutes.
- Stir in ¼ cup water; cook until the potatoes are just tender, about 4 to 5 minutes.
- Season to taste with salt and pepper.
- Transfer the hash browns to a sheet pan; keep warm in the oven while you cook the steaks.
4. Cook the steaks
- Wipe out the pan.
- Add 2 tablespoons oil and warm over medium-high heat until hot but not smoking.
- Add the steaks and cook until well browned, 2 to 4 minutes per side for medium-rare, depending on thickness.
- Transfer to a plate to rest for 5 minutes.
- While the steaks cook, prepare the chimichurri.
5. Make the chimichurri
- Zest and juice the lime.
- Coarsely chop the cilantro.
- Strip the mint leaves from the stems; coarsely chop the leaves.
- In a small bowl, combine the lime zest, cilantro, mint, and remaining garlic.
- Whisk in 1 tablespoon lime juice and 1 to 2 tablespoons oil.
- Season to taste with salt.
6. Serve
- Transfer the hash browns to individual plates.
- Top with the steaks, garnish with the chimichurri, and serve.
My Take on This Recipe:
This was probably one of my favorite steak dishes that I've ever tasted. The addition of the mint into the chimichurri was a unique twist on the traditional recipe that really took the flavors up a notch. The sweet potato hash was also incredibly mouth watering and flavorful to the point that we were practically licking our plates afterwards. We've even incorporated the sweet potato hash and chimichurri into other dishes we made at home because we loved it so much. I highly recommend this dish for a great date night at home! Like I said earlier, you can also add some eggs to it to make an awesome steak and eggs brunch at home, too!
BONUS: AND IF YOU'D LIKE TO TRY SUN BASKET, I HAVE A SPECIAL OFFER FOR TCS READERS! All offers are applied when you checkout.
CLICK HERE TO 3 FREE MEALS FROM SUN BASKET RIGHT NOW!
CLICK HERE TO GET $35 OFF YOUR ORDER! (DISCOUNT APPLIED AT CHECKOUT)
Shop this Post
Special thanks to Sun Basket for providing this recipe and meal kit. All opinions are my own.
Similar Posts For You
The Best Carry-On Luggage for Travelers
Are you looking for the best carry-on luggage to use this year? Check out which carry-on luggage I think is the best for travelers to use, plus get an exclusive discount to try it out!
The Best Carry-On Luggage for Travelers
Picture this: You're heading out for a weekend trip to see your friends down in Miami. You've got your sunnies and sunscreen ready to go, you've got your boarding pass on your phone, you've group texted the gang to let them know how excited you are, you're all packed and ready to go, and suddenly... Your alarm clock goes off late. You have to rush to the airport to make your flight on time. You get to the airport and the line for the check-in counter to check your bag is wrapped around longer than Starbucks' line on a Monday morning. You're probably thinking to yourself "@#%*!!!! How am I ever going to get on this flight?!"
None of this would have ever happened if you just had the right carry-on luggage. And if you had set your alarm clock properly... But really, let's focus here: the luggage. If you had only had a quality carry-on for your trip, you could have easily zipped on through the security line and still made it with time to grab a coffee and croissant.
Make sure to read on to get an exclusive discount on the best carry-on luggage for travelers!
With many US-based airlines charging ridiculous fees to check-in bags for flights, many frequent travelers have been on the hunt for the best carry-on luggage. But with so many great options, how do you choose?
I personally loathe checking bags when I travel. Not only do I get irked at paying the airline more for something that should be included (it is free almost everywhere else in the world except the United States--minus Southwest Airlines because they are amazing), but I just can't stand having to go down to the carousel and wait forever to get my bag once I land. I just want to get out and gooooo! Because of this, I've become a master at learning how to pack really well and fit everything inside of a carry-on luggage and small personal item.
So what is the best carry-on luggage for travelers, you ask? I really think I've found it...
The Carry-On by Away
Starting at just $225, awaytravel.com
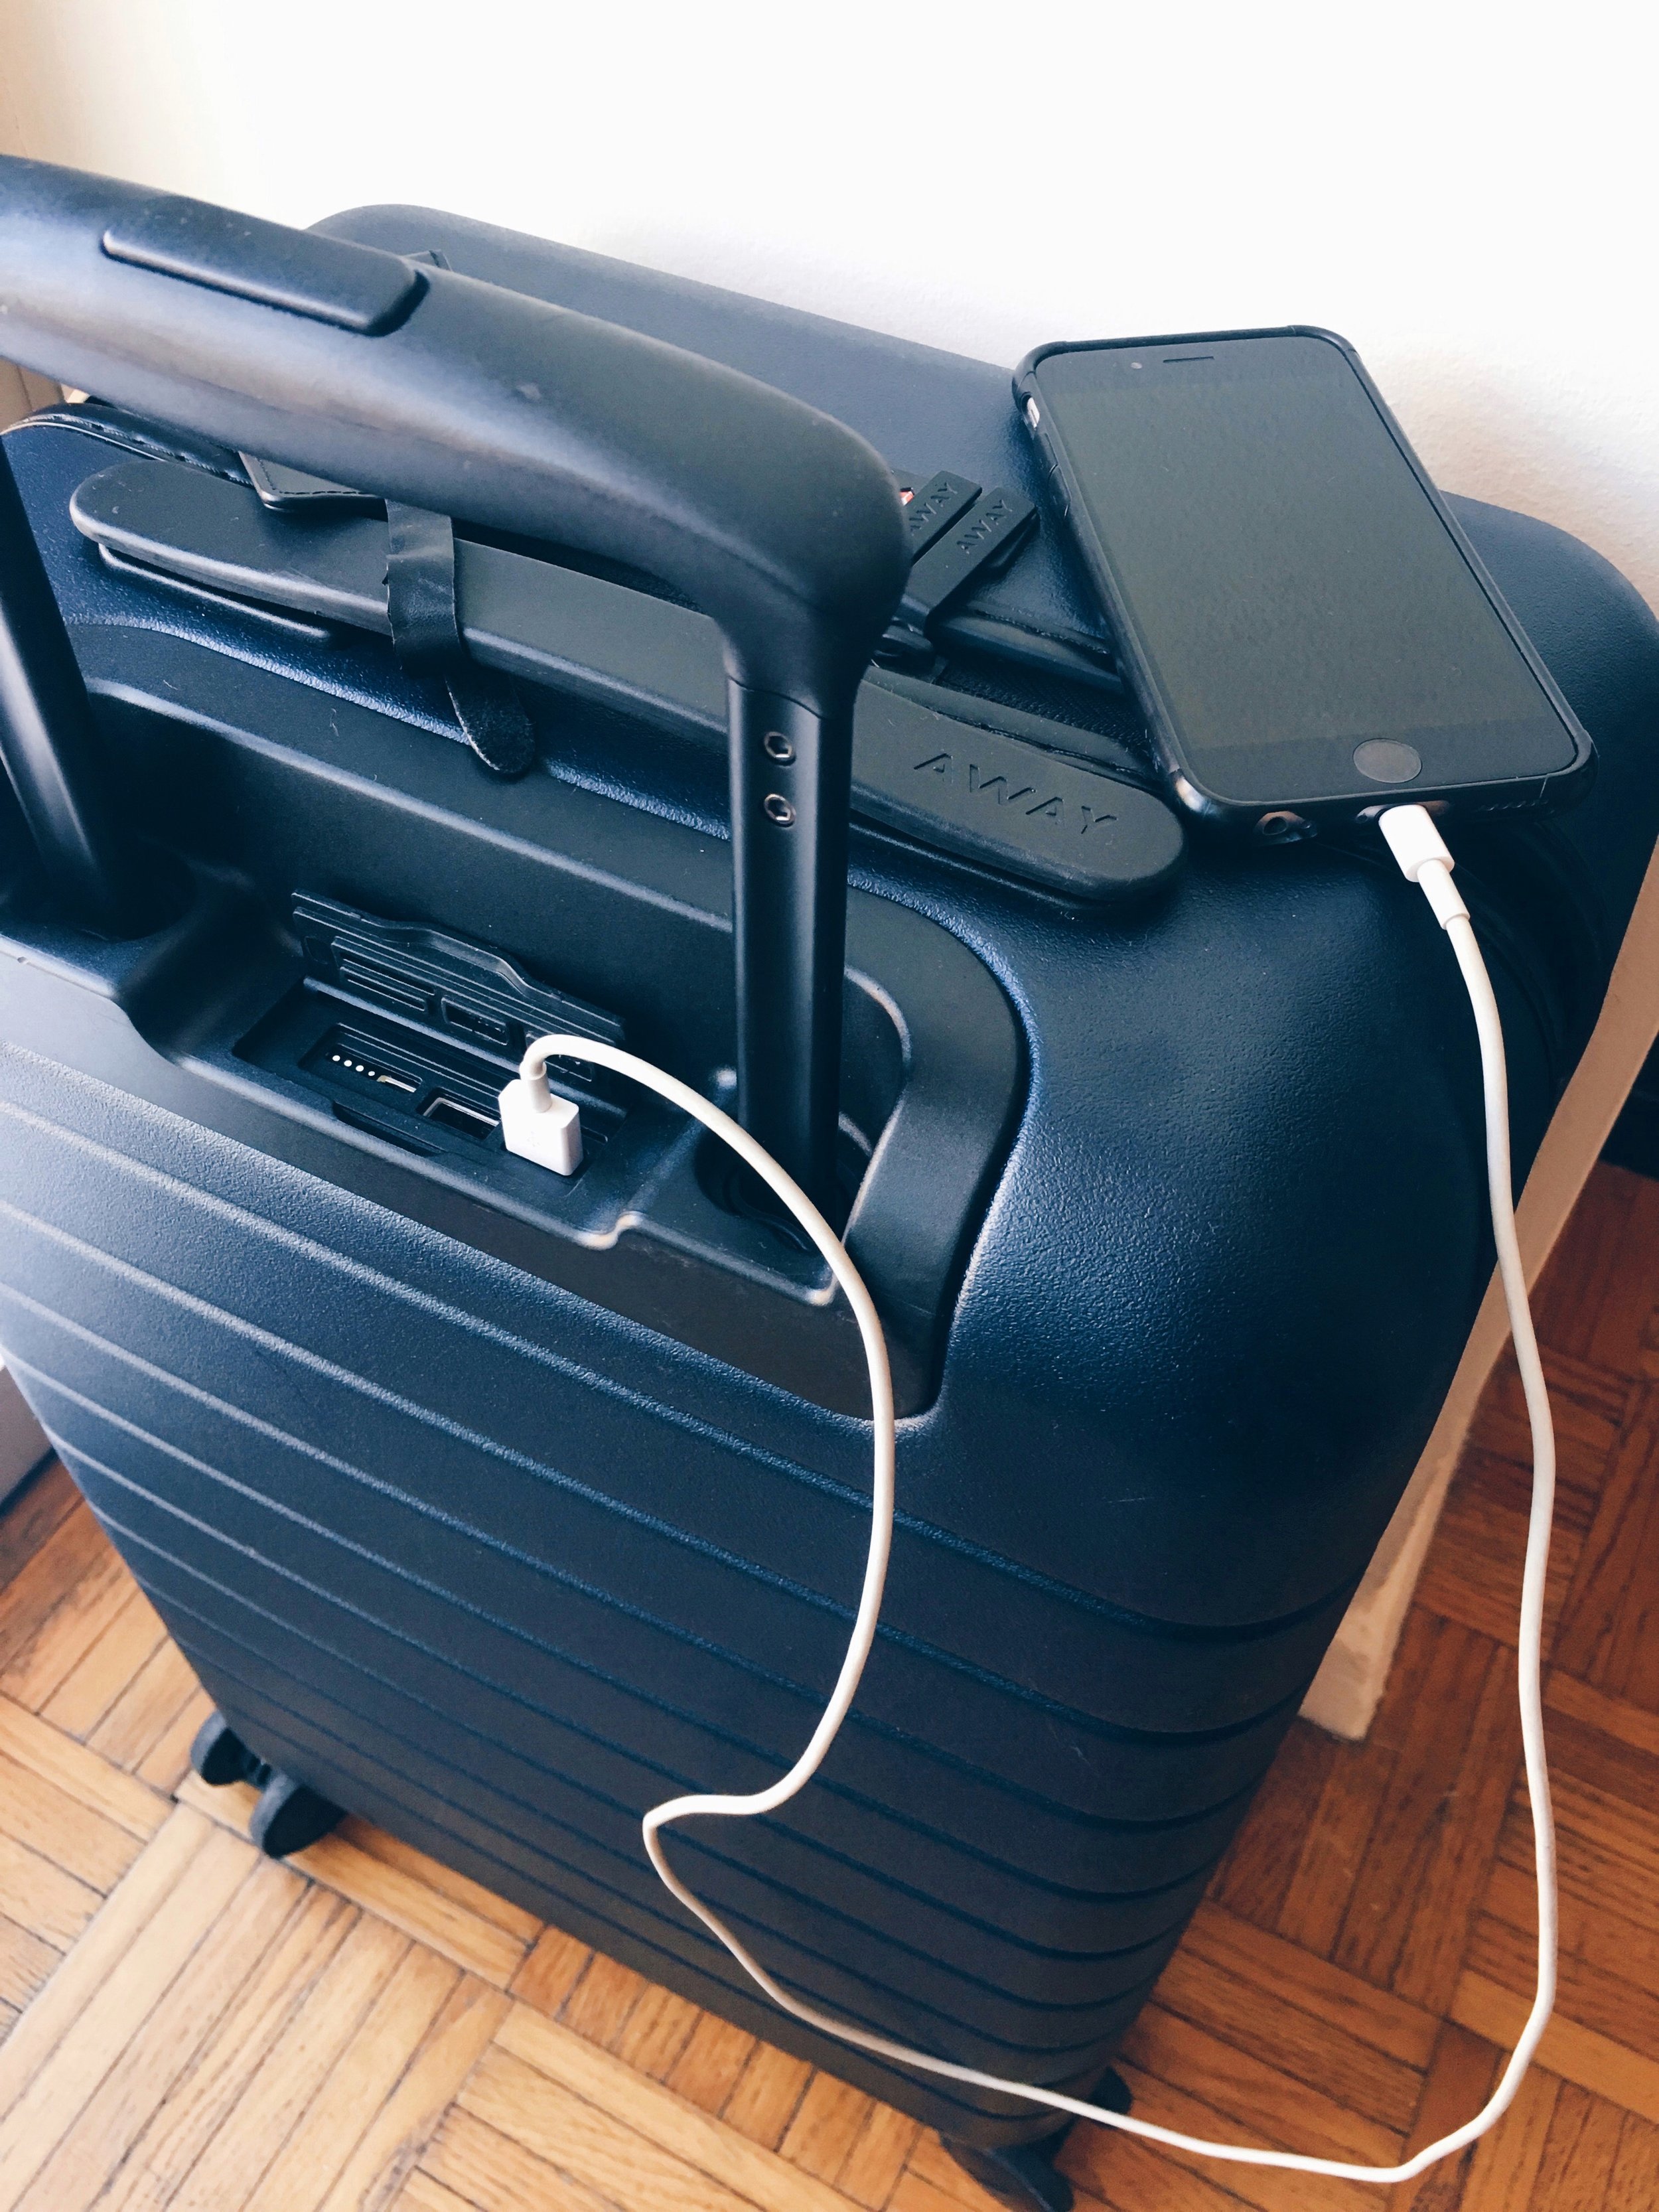
I have been in the market for a new carry-on for the last few months and had seen a couple ads for the Away brand around New York, so I was intrigued to find out more. After doing a little research, the details and specs of this luggage were enough to excite me to try it out. I mean, when you can get a carry-on luggage that also doubles as a portable USB charger and is extremely affordably priced, how can you not get excited about that??
First of all, I just want to note that this luggage absolutely over-exceeded my expectations. I never thought I would love a carry-on luggage so much. Let me detail exactly why...
1. Built-in USB Charger
How many times have you been on a trip and all of a sudden your phone, tablet, or whatever other electronic device dies? It's happened to me more times than I can count. And don't even try and scurry around the airport to find an outlet because half the time they don't work and the other half they are being used.
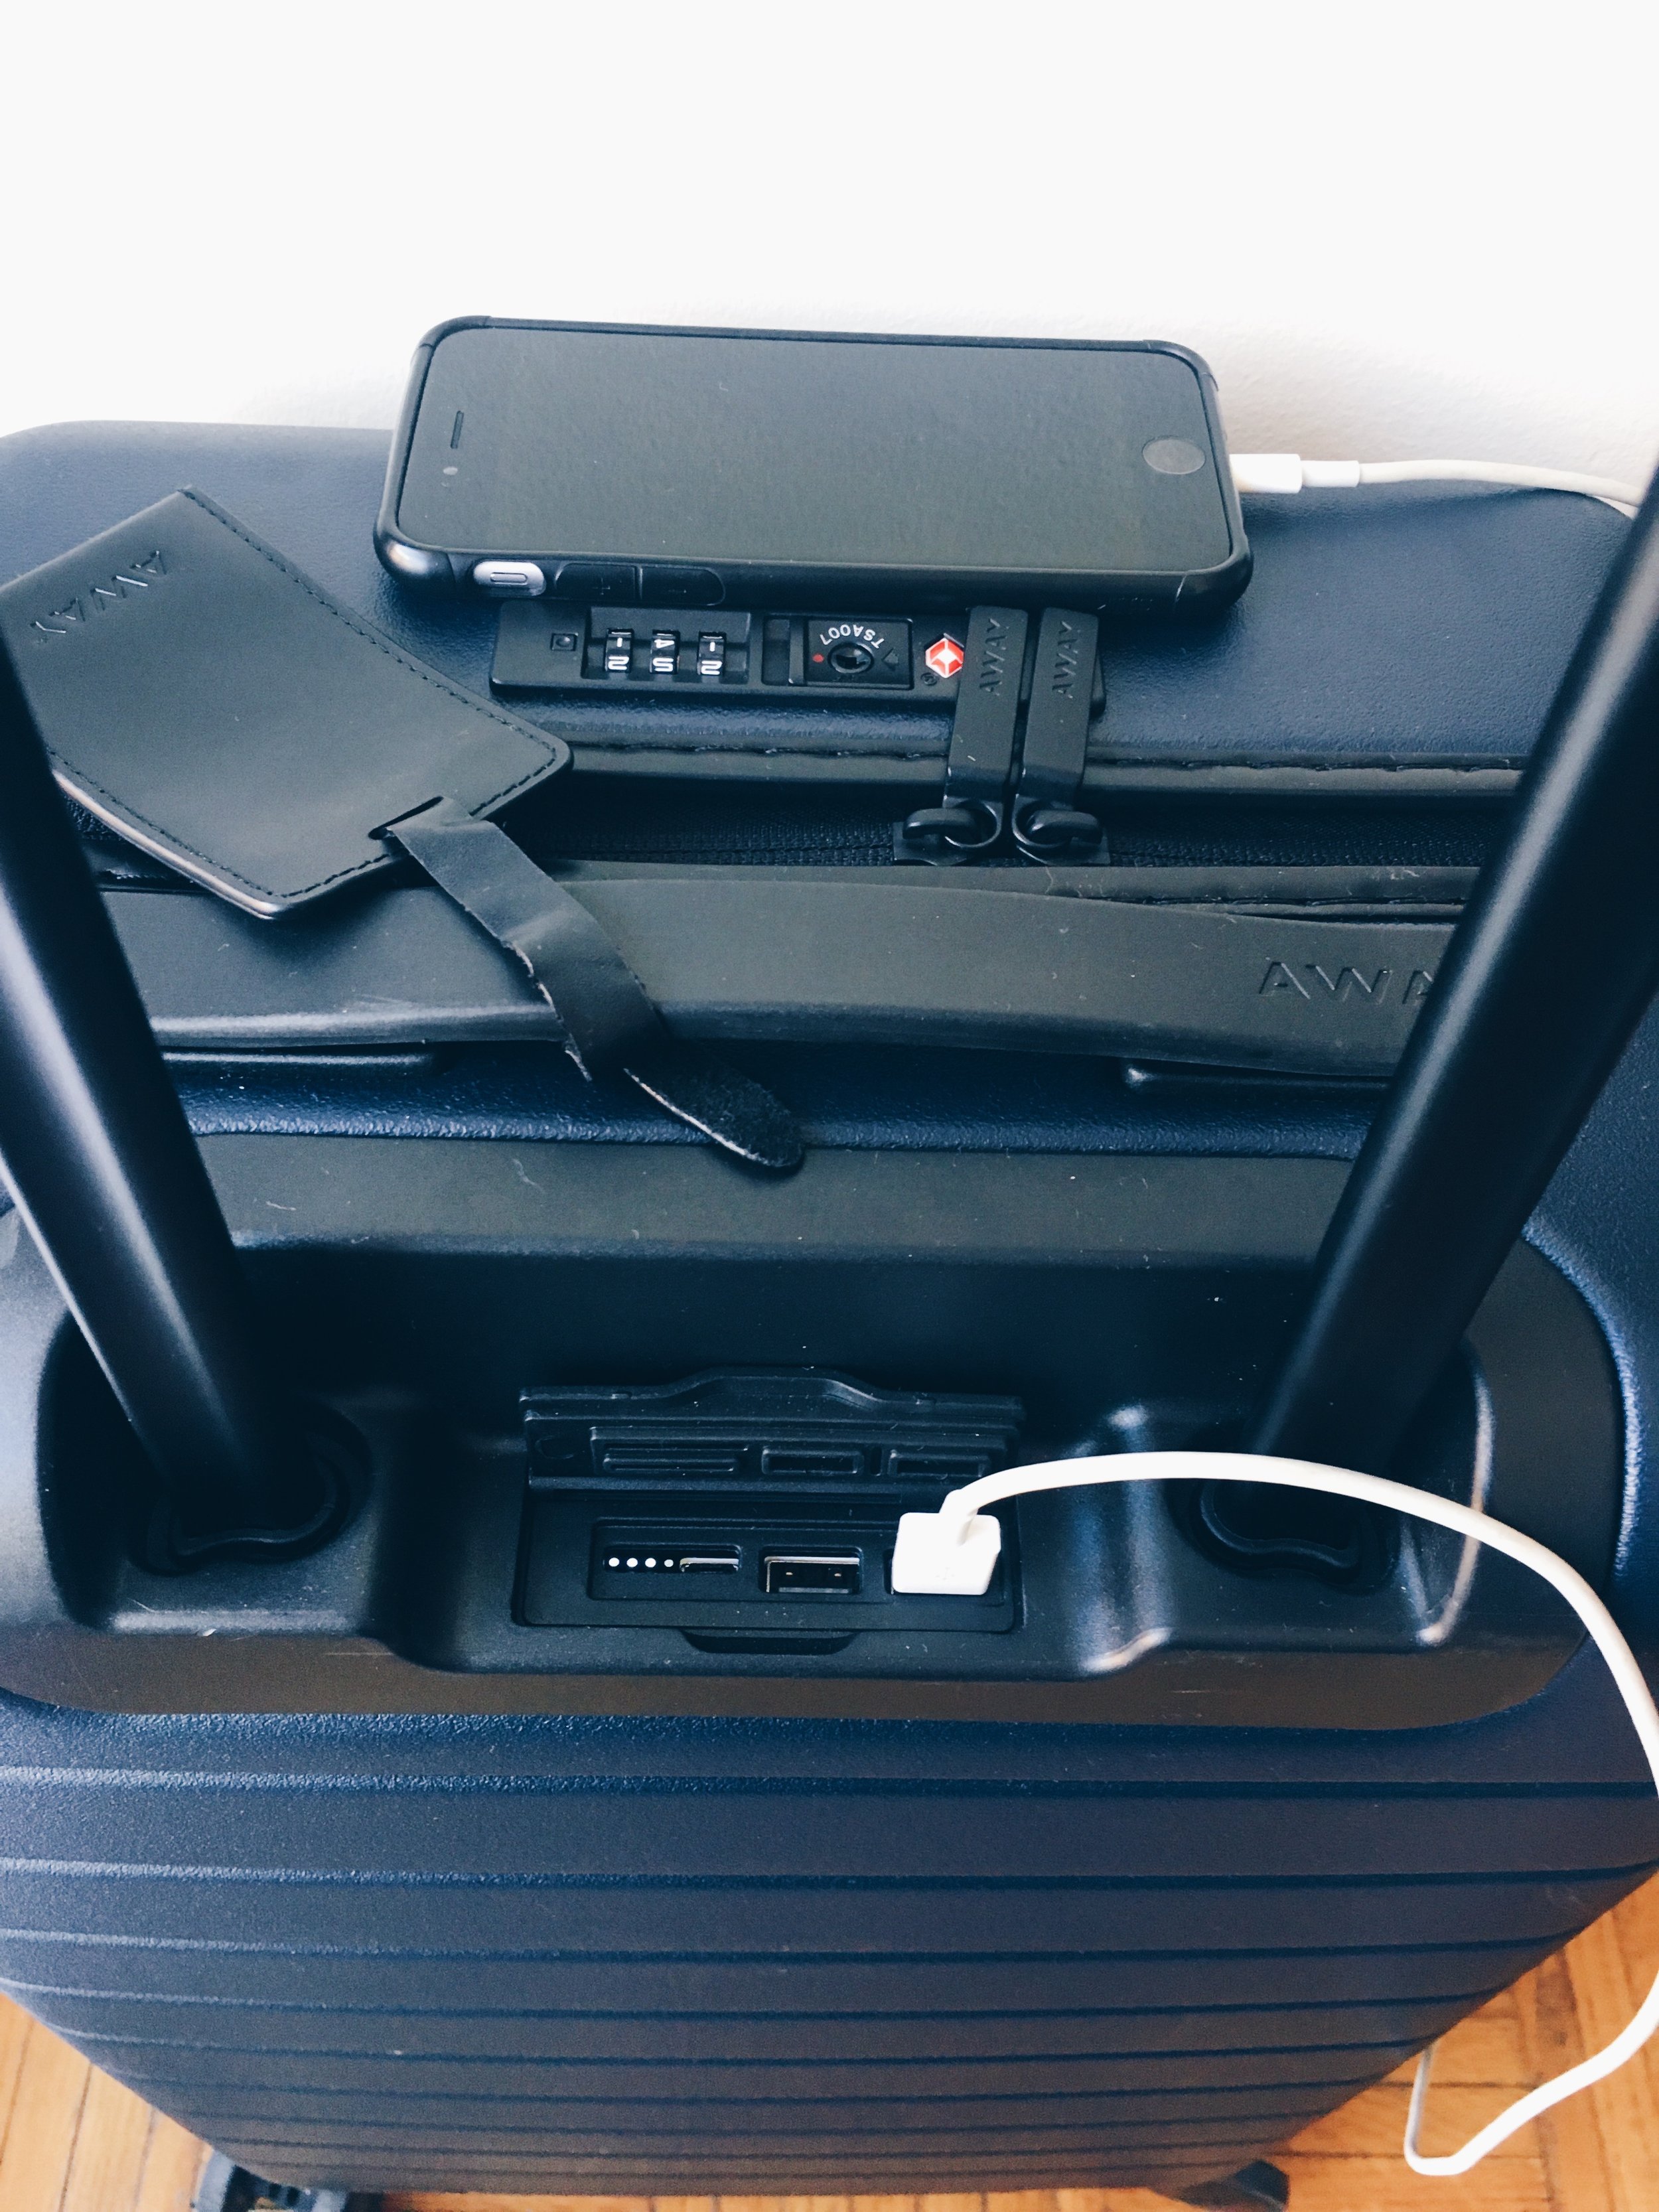
With this carry-on luggage, you have a portable USB charger right at your side! There are even 2 ports available that charge at normal speed and fast speed. The Micro-USB to charge your luggage comes included with your bag. This is such a game changer for travel--I love it!
The battery is also compliant with all FAA, TSA, and DOT regulations, so you shouldn't have a problem with it. The only time I had an issue was at 1 airport in Thailand, which Away tells you about in their little intro booklet you receive once you purchase the luggage. They let me through security, it was just kind of a pain in the butt to put my luggage through the screener twice. Just make sure to read the booklet so you know how to handle that. Everywhere else, you're totally good!
2. Built-in TSA-approved Lock
While I don't always lock up my suitcase, it is nice to know that I have the ability to without having to remember to actually bring my mini locks. The zippers on the luggage conveniently turn into a lock at the top of the luggage.
This feature actually came in handy when I was checking in and out of hotels and had to leave my luggage at the front desk or with the bell men! Just provided an extra sense of security (both figuratively and literally).
3. Plenty of Room With Compression Pads
While I have gotten much, much better at learning to pack only the necessities, there's still a couple travel hacks I have up my sleeves to maximize my efforts and still bring that extra dress or extra pair of shoes without compromising too much space.
The first trick is to use packing cubes to really get your clothes as organized and compressed as possible. I'm obsessed with my Eagle Creek Packing Cubes (which you can find on Amazon right here) because I can organize my clothes by type of garment or by size.
Once you have the packing cubes set to go, the next trick is to have a luggage that will allow you to compress everything even further. With this carry-on luggage, you can use the handy compression pads to make sure everything is nice and tight in there. You can also use other packing hacks like using your shoes as storage space to really maximize efforts here.
I was literally able to pack 2 week's worth of clothes and shoes (along with my toiletries, medicines, and other accessories) into this carry-on luggage because of the compression pads and space that is available. It's amazing!
4. 4-Wheel Drive
If you don't have a carry-on luggage that has 4 wheels, you're doing it wrong. Having 4 wheels on your luggage is soooo much easier to handle than a luggage with 2 wheels. Think about it: you're pushing something instead of pulling something. It's a lot less energy and you can put more weight on it without feeling like you're lugging a bag of bricks. The Premium Hinomoto wheels on this carry-on, which rotate 360 degrees, make for a smooth ride every time.
5. Built-in Laundry Bag
Right inside the luggage, you'll find a fold-out nylon laundry bag that allows you to easily separate your dirty clothes from your clean clothes. Once it's full, it just rests on top of the other items and you can use the compression pads to push it down. Super convenient, especially if you're doing any physical or outdoor activities on your trip!
6. Extremely lightweight and durable
The thing that initially drew me to this carry-on (besides that bad ass USB charger) was the high quality and sleek design of the luggage. The last thing you want is some heavy clunker to carry from airport to airport.
This luggage weighs just 7 lbs. (which is very light for a carry-on) and comes with an extremely durable exterior shell. The material is nearly scratch resistant, a natural shock absorber, and has a little give to it making it easy to expand and give you more space for packing. Basically, it's perfect for long term use and frequent travelers.
7. Convenient storage bag for home
When you get the luggage after placing your order, it comes in a nice fabric storage bag, which they recommend you keep for safe storage when your carry-on is not in use. I understand this isn't like "a deal breaker," but it's just a nice extra thing to have to preserve the lifespan of your carry-on.
BONUS: The Monogram Edition
This is suchhhh a cute addition to an already great carry-on luggage. The Away team has partnered with a super talented artist in New York who will hand-paint up to 3 letters on your suitcase so you can have your own customized bag. This is PERFECT for personalizing your bag or giving a special gift to someone you love! You can chose the color palette and font from the selections available and they will ship your brand new, hand-painted monogram luggage within 2-3 weeks. I absolutely love this and hope to get it on the next Away luggage I get! You can choose this style when you shop their website!
*Use THIS LINK for $20 OFF your first Away purchase!*
So...I'm not going to leave you reading this post without giving you a little something special. Use the link in the box above to get $20 off your first Away purchase! You'll see the discount taken at the time of checkout (scroll towards the bottom of the page to see the price with discount), so no worries on entering a code. Let me know how you like it once you try it out!
Like I said, I'm happy to report back that this carry-on luggage wayyy over exceeded my expectations (as you can tell by this review). I am so in love with this little thing that it would be hard for me to switch over to another carry-on. There's a 99% chance if you see me in an airport in the coming year, I'm going to have this bad boy right by my side.
What do you think about the Away luggage? Have you tried it? Or is there another carry-on that you really love to use when you travel? Let me know in the comments below!
Thank you so much to Away for providing me with a luggage to try out. This post may include affiliate links, which comes at absolutely no cost to you. All proceeds go directly back into maintaining this website and making it better for you. All opinions are my own.
Similar Posts For You
Global Eats: Bangkok Chicken Wings with Coconut-Pineapple "Rice" Recipe
Welcome to "Global Eats," our monthly blog series that brings you recipes and flavors from all around the world! Today's meal is inspired by the street food of Thailand, courtesy of Sun Basket. Try these easy-to-make Bangkok Chicken Wings with Coconut-Pineapple "Rice" this week!
Global Eats: Bangkok Chicken Wings with Coconut-Pineapple "Rice" Recipe
If you've been reading my blog for a while or seen any of my travel guides at one point or another, it probably comes at no surprise how much I love food. It's a top priority I have during travel and it's the first thing I usually recommend to people who are asking for tips about a new city.
Food and travel go hand in hand like a beautiful love story that I can't help but getting in the middle of. Cuisine is a universal (and romantic) language of culture and travel. It is quite literally how we "taste" the places we are visiting and get to experience them on a deeper level.
It's because of this personal love affair with food that I've decided to bring you a new blog series: Global Eats. In Global Eats, I'll be bringing you recipes I love from all around the world so that you can taste the flavors of cultures near and far from the comfort of your home.
So let's dive into our first recipe that will serve up some of those tangy, sweet, and spicy flavors all the way from Thailand! *Stay tuned for a special bonus at the end too!
Bangkok Chicken Wings with Coconut-Pineapple "Rice"
Makes 2 Servings // 670 Calories Per Serving // 35 Minutes
Paleo - Gluten Free - Dairy Free - Soy Free
I got this recipe courtesy of Sun Basket in my Globetrotter Collection. In case you're not familiar with Sun Basket, they are an incredible company that delivers healthy, weekly meals and recipes that come from organic and sustainably sourced seasonal ingredients. Chef Justine Kelly and her team created this tasty (and Paleo-friendly) recipe as a nod to the legendary street food of Bangkok.
I really love Sun Basket because they offer a wide variety of healthy options (Gluten-free, Paleo, and Vegetarian) with their menu selections and they are extremely affordable for the value you're getting (around $11 per meal). It's like someone does the grocery shopping and meal planning for you--AND also gets you the freshest ingredients--without you even having to leave your couch. WIN-WIN! So let's get started!
Ingredients:
- 1¼ pounds chicken wings
- 2 teaspoons baking powder
- ¼ cup unsweetened shredded coconut
- 10 ounces fresh pineapple
- Peeled fresh garlic
- 1 lime
- 1 Thai chile (optional)
- Dipping sauce base (fish sauce - honey)
- ¾ pound cauliflower
- Fresh cilantro
- ½ cup coconut milk
Directions:
1. Prep and roast the chicken
- Heat the oven to 475°F.
- Pat the chicken wings dry with a paper towel.
- Lightly oil a baking rack; line a sheet pan with foil. Set the rack on the prepared sheet pan.
- In a bowl or resealable bag, combine the chicken wings and baking powder. Season generously with salt; toss to coat.
- Roast the wings on the rack, turning halfway through, until well browned, 30 to 40 minutes. While the wings roast, prepare the rest of the meal.
2. Toast the coconut
- In a frying pan over medium heat, toast the coconut until golden, 2 to 3 minutes.
- Transfer to a plate to cool.
3. Cook the pineapple
- Core the pineapple; cut into 1-inch pieces.
- In the same pan over medium-high heat, cook the pineapple in 1 to 2 tablespoons oil over stirring occasionally, until caramelized, 5 to 7 minutes.
- Transfer to a plate; don’t wipe out the pan.
- While the pineapple cooks, prepare the dipping sauce.
4. Make the dipping sauce
- Finely chop enough garlic to measure 1½ teaspoons.
- Zest and juice the lime.
- If using, stem and thinly slice the chile.
- In a large bowl, combine the dipping sauce base, garlic, lime zest, 2 tablespoons lime juice, and as much Thai chile as you like.
- Season with salt, if needed.
5. Make the cauliflower rice
- Using a sharp knife or food processor, cut the cauliflower into rice-sized pieces.
- Coarsely chop the cilantro.
- In the same pan, add 1 to 2 teaspoons oil if needed; warm over medium-high heat until hot but not smoking.
- Add the cauliflower, season with salt and pepper, and cook, stirring occasionally, until lightly browned, 3 to 4 minutes.
- Add the coconut milk and simmer until the cauliflower is tender, 1 to 2 minutes.
- Stir in the pineapple and cook until heated through, about 1 minute.
6. Serve
- Add the chicken wings to the sauce and toss to coat.
- Transfer the cauliflower rice to individual plates; garnish with the toasted coconut.
- Top with the chicken, garnish with the cilantro, and serve with the sauce on the side.
Additional Chef's tip
- A classic Southeast Asian trick, a fine coating of baking powder makes the chicken wings more alkaline and helps them brown. If you don’t have a rack large enough to hold the wings in a single layer, cook them on a lightly oiled, foil-lined sheet pan.
My Take on This Recipe:
This dish came packed with flavors! You had tangy, sweet, and a little spice coming at you in every bite. We even added a little side of Sriracha (my condiment obsession) to give it an extra kick of spice. I've never made chicken wings at home before, so I was surprised how easy it was. The coconut-pineapple "rice" was another unique and healthy twist to this dish that gave a great alternative to eating rice on the side. Would absolutely recommend this recipe to anyone who loves those Asian flavors in their cuisine. We were both practically licking the plate afterwards because it was so yummy!
BONUS: And if you'd like to try Sun Basket, I have a special offer for TCS readers!
Click here to 3 FREE MEALS from Sun Basket right now!
Click here to get $35 off your order! (Discount applied at checkout)
Shop This Post
Special thanks to Sun Basket for providing this recipe and meal kit. All opinions are my own.
Similar Posts for You
10 Beauty Products Under $35 to Always Travel With
Pro Travel Tip: If you want to feel extra pampered and rejuvenated while traveling, take note of the beauty products you're traveling with. Bring a little luxury from home and treat yourself while traveling with these 10 beauty products!
10 Beauty Products Under $35 to Always Travel With
Before I was on the road all the time, I absolutely loved indulging in different beauty treatments and experimenting with all kinds of makeup products at home. One of my tricks for feeling more relaxed and in my groove while traveling is bringing a little comfort and luxury from home with me on all of my trips.
The downside of constantly traveling is that you're not in the comfort of your own home every day to use all of your favorite products (or even experiment with new ones). The upside is that you can start to bring some of those goodies with you (since virtually everything comes in travel-size now) and even start taking advantage of the smaller sized items to experiment with new stuff while you're on the road.
I personally love browsing the travel sections of Sephora, Ulta, or the local drug store to get some of my favorite products. If you're looking for some inspiration of what type of beauty products you should be taking on your next trip, check out my 10 favorites right here!
Batiste Dry Shampoo
I've tried a lot of dry shampoos out there and this one always comes in first place. It's great on dark hair, it smells amazing, and it's extremely affordable!
Minimergency Kit
This little kit is such a lifesaver! It has all the little things that you might forget (or not think) to pack. There's everything from a mini sewing kit, to tampons, and even pain relievers.
Biossance Rose Oil
I recently started incorporating this product into my beauty routine and I'm OBSESSED with it. The oil leaves my face radiant and glowing and it smells incredible. Highly recommend even just as a daily or nightly moisturizer.
$14.00
Tea Tree Oil
If you've never used tea tree oil, you're seriously missing out. Tea tree oil is an incredible gift from the gods that gets rid of blemishes basically overnight. Anytime I feel one coming on, I dab this on and it works like magic. I love this mini set that comes with other essential oils that are fabulous for travel as well. (*Dab a little lavender on your wrists or your pillow at night for soothing sleep!)
bh Cosmetic Contour Palette
I used to lug around my big makeup bag with me when I traveled, and then I found this amazing contour palette that has pretty much everything I need in 1 thin, compact space. Traveling with this has made my life so much easier and saved a lot of room in my bag!
Laura Mercier Tinted Moisturizer with SPF
I love using tinted moisturizer because it gives you that nice touch of color that your complexion is yearning for in the morning. Laura Mercier's is my favorite and I love that it has SPF in it!
First Aid Beauty Ultra Repair Instant Oatmeal Mask
When you're traveling frequently, your face is prone to a lot of things that are really harsh on your skin. I love rejuvenating my skin every week with a good facial mask. Oatmeal, mud, and charcoal are my personal favorites. There are lots of masks that you can buy individual packs of, which are great for travel!
Neutrogena Wipes
The one and only. I've been using these wipes for years and I'll probably never use anything else. Gets the job done and makes my skin feel fresh afterwards.
L'oreal Sublime Bronze Tan Towels
In recent years, I've been making an effort to protect my skin more and stay out of the sun for prolonged periods of time. However, to avoid looking whiter than a sheet of paper, I love these L'Oreal tan towels because they give me a nice glow without having to be in the sun for a day. I'll usually use 1 towel before bed and shower it off in the morning.
Nail Polish Remover Pads
Another way to give yourself a little luxury on the road without paying tons of money at the salon is to give yourself an at-home mani/pedi. I always travel with my favorite nail color and a couple of polish remover pads like these so I can change it up whenever I want.
The best tip for testing out new beauty products for travel is to browse the travel sections of your favorite stores and pick up some new things to test out on your trips (or at home!).
Have you used any of these products for travel? Comment below with other beauty products that you love to travel with!
Similar Posts For You
Home Accessories Every Traveler Should Have
Why wait until your next trip to get those amazing sensations of wanderlust? Bring your travels home with you and start incorporating new accessories into your space that can bring you back to your favorite places. Here are 14 home decor accessories that every traveler should have.
Home Accessories Every Traveler Should Have
If you're a fellow travel junkie like me, you understand the very real struggle of having wanderlust. It's almost as if your body is in constant need of adventure, travel, or exploring.
But you don't have to wait until your next trip to get those good feelings of travel running through your system. You can start feeling that travel bug every day if you wanted to! By "bringing the travel home with you," you can begin adding little things into your home decor to make you feel those sparks of wanderlust day in and day out.
The best way to do this is to start collecting beautiful pieces of decor while you're traveling to bring home with you. This can be books, kitchen supplies, furniture, accessories, or little trinkets. If you want to start with a baseline of products before you start incorporating more, here are 14 home accessories every traveler should have in their home!
Vintage Trunks
Great for extra storage and decor. You can also pick some up at a fabulous antique store!
Global Map Decor
Any decor that has either a map of the world or a map of your favorite destination is a great keepsake to have in your home.
Exotic Table
Try incorporating different styles of furniture throughout your home to give a cool, eclectic vibe. I love the look of these Moroccan tables.
City Maps
Having a unique map of your favorite city can be a daily reminder of that place and bring you those positive travel feelings.
Feng Shui Desk Accessories
If you work from home like I do, it's super important to have your space feel clutter free and zen. I love having little desk accessories like bamboo, a zen garden, or a mini gong.
Coffee Table Books
No travel-loving home is complete without a few unique coffee table books!
Cozy Blankets
Turn your home into a luxury 5-star hotel by adding in cozy blankets and bedding. You really can never have enough!
Moroccan Rug
Even though these rugs can be expensive, they are such a beautiful staple piece to have in any room of your house.
Antique Globe
No traveler's home is complete without at least 1 globe. (I have like 4 in my house...EEEP!)
Antique Compass
Having little accessories and knick knacks can help accentuate the travel vibe you want to give off in your home. Picking up a cool compass is a great way to do that.
Elephant Bookends
Elephant decor is really popular in some Asian cultures, and it's said to bring good luck, wisdom, and strength. It adds a beautiful touch to any home!
Funky Serving Platter
If you're a traveler and you love to entertain guests, be on the lookout for a fun, eclectic serving platter to have for events.
Rustic Mirror
Having lots of mirrors around your space can give the illusion that it's bigger than it actually is. Opt for having some rustic looking mirrors for that vintage/antique feel.
Eclectic Accent Tables
Depending on the size of your space, you can use these fun accent tables next to your couch or as a nightstand. They definitely offer a fun element to the room!
What are other travel-related home decor or accessories you love having in your house? Comment below with more suggestions!
Similar Posts For You
How to Beat Jet Lag
Don't let jet lag ever get in the way of your travels again! This guide will show you how to beat jet lag like a travel pro with 10 easy steps. The best part is you can do it all naturally without taking any pills, supplements, or sleep aids.
How to Beat Jet Lag
Anyone who has traveled around across multiple time zones knows that jet lag is a very. real. thing. Sometimes even traveling a seemingly short distance like from Chicago to LA (a 2-hour time difference) can cause your body to get all out of whack.
*Fun Fact: Flying EAST will actually increase the possibility of you feeling symptoms of jet lag!*
Jet lag is caused by a sudden change in your body's internal clock, aka your Circadian Rhythm. Symptoms of jet lag can include:
- Disturbed sleep patterns
- Poor physical performance/energy
- Lack of concentration/mental energy
- Change in appetite
- Nausea
- Indigestion or constipation
- Headaches
Despite all these icky things that can happen, there are a few travel hacks and tips you can use to mitigate the possibility of jet lag and beat it all together! Try using some of these pro travel tips next time you're flying across time zones to beat the jet lag naturally and skip on having to take any pills or supplements.
Before Your Flight
1. Adjust Your Schedule
When you're traveling to a new time zone, try shifting your schedule at least a day or two in advance to start preparing. Adjust the time you go to bed and do some of your daily routines, change your watch to the new time zone, and even eat some of your meals on the new time zone. Doing this will help to decrease your body's shock of internal time change when you actually arrive to your destination.
2. Hit the Gym
Getting a good workout in before you embark on a long haul flight is a good way to get the blood circulating properly in your body and relax any tense muscles. If it fits into your schedule, hit the gym before you leave for a long flight so you can feel more relaxed and mobile. Don't forget to get a nice stretch in there too!
3. Eat the Right Things
Avoid eating foods that are too greasy, spicy, or heavy before your flights. When you sit on a plane for extended periods of time with these types of foods in your body, it can cause indigestion, stomach pains, and other gross things. Eat a nutritious meal before your flight, and try to skip the booze and coffee as caffeine and alcohol can severely dehydrate you at high altitudes.
4. Fly at Night
If it's possible (especially if you're traveling eastbound), book your flight to fly at night. This way, you can sort of trick your body into thinking that it's bedtime when you get on the plane. When you arrive to your destination, it will most likely be daytime, so you'll be rested and ready to go!
During Your Flight
5. Stay on Your Destination's Time
Once you get onto the plane, stay on the time schedule of your destination. If it's bedtime in your destination, try to get right to sleep. If it's daytime at your destination, do everything you can to stay awake. I did this on a 13-hour flight from Istanbul to Chicago once... Oh boy... I was big time STRUGGLING when I arrived at O'Hare, but I slept like a baby that night once I got back to my bed. Do everything you can to stay on your new time zone!
6. Move Around
Make sure you're moving around here and there during your flight. Get up and take a small walk around the cabin or get up to stretch every once in awhile. You can even do small stretches--like stretching your arms or rolling your ankles--in your seat without having to get up and do much movement. Just something to get the blood circulating again is better than nothing.
7. Keep Hydrated
Dehydration while flying is a huge contributor to increased jet lag. Make sure you're keeping hydrated by bringing a large water bottle with you to the airport and filling it up before you go. Always take advantage of the flight attendants providing water when they come around. Try your best to avoid caffeine and alcohol when you're flying too since that causes extreme dehydration in high altitudes.
Once You Arrive
8. Hit the Ground Running
Literally and figuratively... I know how appealing it sounds to take a nap once you arrive to your destination, but do everything you can to stay active if it's daytime. Hit the hotel gym and get a nice sweat going (it's great for circulation and getting your muscles back to normal), rehydrate by drinking lots of water, and spend as much time in natural light as possible. Sometimes the excitement of being in a new destination is enough to give me the energy to stay up and about. Whatever you choose to do, just make sure you keep at it and keep moving!
9. Eat a High Protein Breakfast
If it's morning at your destination, eat a high protein breakfast as soon as you arrive to help prevent drowsiness and keep you alert. Eating lots of protein will replenish your body with the fuel it needs to get going for the rest of the day. The healthier the better!
10. Eliminate Distractions at Bedtime
When it comes time for bed, put away your cell phone and turn off the TV at least an hour before you hit the hay. The lights from the screens will disrupt your sleep cycle, which is the last thing you want when you're trying to adjust to the new time zone. You need to let your mind and body decompress before it's time to sleep.
What are ways that you try to fight jet lag? Comment below with some more tips!
Similar Posts For You
9 Ways to Thrive on Your Next Flight
We've all heard about "how to survive a flight," but what about how to thrive during a flight? Here are 9 ways for you to thrive on your next flight so that you'll have a positive experience during travel and no longer have to cringe at the mere thought of going to the airport.
9 Ways to Thrive on Your Next Flight
We've all seen tips about "how to survive your next flight," but I don't like to live under those negative terms. Instead of surviving, what about thriving? Ever wonder how you can THRIVE on your next flight? (Yes, the power of positive thinking is a real thing--even in travel!)
It's time to shift that mindset, people! Today, I'm giving you 9 ways for you to thrive on your next flight so that you'll have a positive experience during travel and no longer have to cringe at the mere thought of going to the airport.
Pre-Airport
1. Get a Mobile Boarding Pass
It's 2016, everyone, and it's time to start taking advantage of the technological advances we've made with travel. It really blows my mind that there are still people who don't take advantage of getting a mobile boarding pass sent to their phones. Like...why would you want to sit in line at the airport to get that little piece of paper? It's time consuming, a waste of paper, and it's just a pain in the butt!
I get that there are extenuating circumstances that cause you to HAVE to get the physical boarding pass; but if it's possible, download your airline's mobile app (even if you delete it right after your flight), and get your mobile boarding pass sent to your phone before you head to the airport. It's so easy, saves a ton of time waiting in line, and it's good for the environment! Heyyy!
2. Bring a Positive Attitude
Airports have somehow become a hub for cranky people. Have you noticed this too? It sometimes seems like no one there is happy, and that energy spreads--fast. People are pissed off because of the lines, they are in a hurry, the airline customer service agents are having a bad day... Whatever the reason, it's just not a generally happy place.
But... Can you imagine what would happen if everyone came to the airport with a smile and a good, positive attitude? OMG! The dynamic would completely change! People would be helpful, humorous, and pleasant to be around! Well, all it takes is one person to start and shift that dynamic. One positive attitude, one smile, one friendly greeting, and it could become a domino effect. Be that person.
I've actually tried this on numerous occasions, and my positive attitude has actually paid off big time for me. Because of my positive attitude, I've gotten upgraded to Business Class FOR FREE on an international flight when the airline messed up my reservation (comfortable living for 14 hours will always trump a hissy fit); I've gotten my luggage checked for free; I've skipped the TSA line to the front; I've gotten free food and drinks on the flight; and I've even gotten thousands of reward points put back into my account for providing really positive feedback about my flight experiences (all done on my own will). Having a gracious, positive attitude spreads that good energy and it pays off!
3. ...And a Proper Water Bottle
So you might have read this in my recent article, "How to Save Money During Travel," but I still stand by the idea that every traveler needs to bring a specific type of water bottle during their trip.
There are 2 types of water bottles I like: 1) SmartWater--purely because of the bottle itself and the fact that it barely crinkles when you put it in your bag; and 2) A bottle with an integrated filter system in it so that you can safely drink water from anywhere in the world--even a pond!
Whichever you choose, don't forget to pack the bottle in your bag before you head to the airport so you're not paying ridiculous prices for water at the airport. I've done this before and it hurts so much to fork over the cash just because you forgot to plan ahead :(
At the Airport
4. Carry-On vs. Checking Your Bag?
Ohhhh the age-old question: Should you check your bag or carry it on? Here's the thing... It comes down to a few factors: price, convenience, and in-flight experience. I really have mixed feelings about this one, so I've broken it down into some pros and cons for you to decide what's best for you:
Pros/Cons of Carrying On Your Bag
- (+) Quick access into the terminal (assuming you have your mobile boarding pass)
- (+) It forces you to pack less and more efficiently
- (+) Save money on baggage fees
- (+) The airline definitely won't lose your luggage
- (+) Quick access out of the airport once you land
- (-) It forces you to pack less (ugh I just wanted to bring those other sandals!)
- (-) You could be fighting for overhead bin space
- (-) Probably won't have optimal leg stretching space if you're storing your 2nd bag under the seat in front of you
- (-) Lugging bags around can be heavy
Pros/Cons of Checking Your Bag
- (+) Don't have to carry anything around inside the terminal
- (+) You can pack however much you want
- (+) Optimal leg stretching space is pretty much guaranteed
- (+) Sometimes it's free (shout out to all the airlines who don't charge baggage fees--you da real ones)
- (-) Baggage fees
- (-) Waiting in line to check it
- (-) Waiting in line to retrieve it
- (-) Risk of it getting lost (which isn't that big of a percentage anymore)
5. Skip the Coffee
I know it may be hard to resist the urge to have your daily "necessary" cup of coffee, but do everything you can to skip the coffee before a flight. I'm not a doctor and I'm not here to argue the effects of coffee on the body, but I do know that flying at high altitudes can severely dehydrate the body. Opt for drinking water instead of coffee to replenish your system and prepare it for the journey ahead. Plus, you won't feel those caffeine jitters on the flight and might have a better chance of relaxing.
6. ...And the Unhealthy Foods
Again, I'm not a doctor, but I do know that eating unhealthy foods (i.e. processed foods, "bad" carbs, too much salt, fast food, etc.) can cause bloating, discomfort, dehydration, irregular blood flow, and other gross stuff that you definitely DON'T want to experience when you're thriving on your flight. Skip the airport food and bring your own snacks instead. Pack a little fruit, maybe some veggies, a little yogurt...whatever you want! As long as it's healthy and will hold you over until you reach your destination. You'll save money and your body will thank you for it.
On the Flight
7. Block Out the Noise
We've all been on those flights with screaming babies, obnoxious passengers, or overbearing flight attendants. Do yourself a favor and create your own personal oasis in your airline seat. Block out all the noise you can. I personally love traveling with a pair of earplugs or some noise cancelling headphones to quiet of all the commotion around me. Bonus points if you can block out the light too with a hat, sunglasses, or even a scarf!
8. Ease Your Flying Anxiety
So I have a confession... I have flying anxiety. I know! How can I be a travel blogger and still get anxious to fly?! I don't know, but it's something I deal with every time I step onto an airplane. Because of this, I've come up with a few ways to ensure I have as peaceful a flight as possible. Try some of these tips out if you also have flying anxiety:
- Have relaxing meditation music queued up on your device. I have my specific playlist for flying ready to go, I plug my noise cancelling headphones in, and I get in the zone.
- Use simple breathing techniques to calmly bring yourself to your center. When you're tense or anxious, your body's natural reaction is to stop breathing (or breath shorter/lighter), so it's really important to remember to breathe! No hyperventilating allowed--just calm breathing. Deep one in, deep one out...
- Think positive thoughts. I really believe that flying anxiety is worsened because the media only highlights all the negative stories about travel. Shifting your mindset to believing everything is going to run smoothly and how it should is one of the best ways to ease your tension and anxiety. Do everything in your power to overcome any negative thoughts with positive ones. And breathe!
- Throw back a cocktail or two. Ok, so I know that there are tons of medical reasons why you shouldn't drink on a flight or drink to ease anxiety; but, I have to admit, I've been on flights where I was feeling a little more anxious than usual and I gulped down a glass of Sauvignon Blanc (or two) and instantly felt more at ease. Please get me right here: I'm not advocating drinking to solve anxiety. I'm just saying that it helps me (and some other people I know) relax a little during air travel. If you're going to do so, please drink responsibly...and don't be an asshole.
9. ...And Relax
What's your idea of relaxing during travel? Is it reading a good book? Listening to your favorite jams? Taking a much needed nap? Whatever it is, do it! Take a break from the work and hustle and relax while you're on your flight! Put your bags up in the storage bins, stretch out your legs, and take the time to chill out. It's one of the few times that you can unapologetically unplug from the world and have time for yourself.
Prep your entertainment before hand: charge all of your devices; upload that TV show you've been wanting to catch on your iPad; download a book you want to read on your Kindle; or buy that magazine you've been wanting to flip through. You are in complete control of making sure you thrive on your flight. *I personally love kicking back and taking a nap.
What are ways that you like to thrive on a flight? Comment below with other suggestions!
PS--See some of my favorite travel gear that I can't live without right here!
Similar Posts For You
How to Save Money During Travel and Spend Less Than $50 Per Day
How good at saving money during travel are you? Can you spend less than $50 per day? Less than $30? Check out these tips that will help you save money during travel so that you never have to hit the ATM during your trip. Because let's face it: the ATM is a buzzkill.
How to Save Money During Travel and Spend Less Than $50 Per Day
Raise your hand if you like to save money during travel... *TWO HANDS GO UP* If you're like me, you want the money to go as far as it can and never have to look at your bank account or go to the ATM while you're traveling. It's such a buzzkill!
I'm alllll about saving money during travel and I want to help you do the same. As a frequent traveler, I've come up with a few ways that you can make sure your travel budget goes as far as possible so that you never have to hit the ATM for extra cash (unless you really want to). Let's jump right in!
Start With This Formula to Plan Your Budget
In order to save money during travel, you have to have a target budget in mind so you can keep yourself on track. Start with this formula to plan how much you'll want to put aside:
Airfare & Transportation + Accommodations + Daily Allowance = TRAVEL BUDGET
- Calculate your airfare and average transportation costs first. Try to find cheap flights (check this post for tips), plan out how to get to/from the airport (public transit, taxi, or rental), and how you'll be getting around every day (public transit, taxi, walking, or rental). Public transit will always be the cheapest option for getting around in a city, and you basically get to live how the locals live!
- Calculate your accommodations next. You can save money by staying with a friend, Airbnb, or Couchsurfing.
- Last, give yourself a daily allowance. Are you going to spend $20, $50, or $100 per day? It's actually not that hard to only budget $30-50 per day anywhere in the world (check this post for the Top 12 Cheapest Destinations that cost < $50 per day). Sometimes I even manage to spend less than that! You just need to know when to save and when to spend.
Now that you've got your budget, I'll show you ways to save on your daily allowance! I've gotten really good at spending only $15-30 per day sometimes on my allowance, so it is possible.
1. Use Cash
You know what sucks? Seeing cash leave your hands. It sucks a lot. There's some sort of mental trigger that happens whenever we fork up the money to physically hand over to someone. When you see the money actually leave your hands it's much worse than swiping a credit or debit card. Amirite?!
To save on your daily allowance, consider using cash only (or mostly cash) in order to be conscious of what you're spending. It allows you to have the exact amount of money you're willing to spend and ensure that you don't go over budget.
2. Take Advantage of FREE Stuff
Who doesn't love free stuff?! I freakin' LOVE free stuff! There are so many ways to take advantage of free things while you're traveling to make sure you stay on budget. Here are some tips:
- Check to see if your hotel or Airbnb offer breakfast or appetizers for free. Most places do, you just need to take advantage of it! *I'll even snag a few apples, snacks, or whatever else for later in my room so I can snack when I'm hungry!
- Check to see if your accommodation provides free shuttle transportation to/from the airport to help you save on transportation costs
- See if any museums or attractions you want to visit offer free (or discounted) admission days. A lot of major museums offer at least 1 "deal" day. All you need to do is check their website!
- Look for free events happening around town during your visit. So many cities often have free street festivals, concerts, or events going on throughout the year. You can check Thrillist, Timeout, or other similar websites to see if there is anything worth attending.
3. Go to the Local Market or Grocery Shop
You can save a boat load of money on food just by shopping at the local market or grocery store for basic needs. As soon as you arrive to your destination, find a local market where you can buy fruit, veggies, and other snacks to have during your trip. You can also hit up the grocery store's deli to get less expensive meals or snacks.
I also love buying simple stuff for sandwiches or salads (especially if there is a fridge in my room) so I can make easy meals during my stay. Imagine: You'll be saving $10-25 per meal just by doing this! Using this tip will help cut back your food costs by a lotttt.
PRO TIP: Are you heading to Disney, Universal Studios, or another theme park that allows you to bring food into the park? Pack your lunch before you go! You'll save SO MUCH by doing this! Rent a locker when you arrive and store your lunch box in there. I do this all the time!
4. Walk Everywhere
In my opinion, the best way to get to know a new city is by walking. Walk everywhere you can! Skip the cabs, trains, or buses and take a walk. You'll probably stumble upon something you wouldn't have seen from the inside of a taxi. Plus it's FREE!
5. Bring A Water Bottle
Tip #1 of traveling is to always stay hydrated. But don't waste your money on buying tons of water when you arrive (or even when you get to the airport). Always bring an empty water bottle with you to refill and reuse. As a professional traveler, I recommend these 2 types of water bottles for very specific reasons:
1) SmartWater - You're probably asking, "Why? Why would I use SmartWater over any other regular bottle of water?" And no, this isn't a plug or a sponsored mention at all. I choose it FOR THE BOTTLE ITSELF--that's why! Have you ever traveled with a bottle of Ice Mountain or any other brand of plastic water bottle? They crinkle up in like 2 seconds! It drives me nuts! You throw it in your bag, it crinkles instantly...and then you can't fill it up properly anymore, there are too many crinkles in the bottle, it's a mess. With SmartWater, the bottles don't crinkle as easily and you'll always get the exact amount of water you want. See? There's a method to the madness!
2) A Water Bottle With an Integrated Filter - I freaking love how technology is advancing daily conveniences for us. There are water bottles with integrated filters in them now so that you can ensure all the water you drink will be purified and rid of toxins. I personally love LifeStraw's Go Water Bottle (and no, this isn't a plug. I legit love it) because of their filter system and quality bottle. You can literally get water from a pond and it will filter it for you! How cool?!
6. Eat Tapas Style
Another dining tip: try to eat "tapas style" wherever you go. So I don't necessarily mean only go to Tapas style places (although I could totally get down with that). I mean opt for appetizers instead of expensive entrees, share your plates, and cut back on your portions. Maybe you can try 2-3 appetizers for less than or equal to the price of 1 entree. It's definitely worth looking into!
7. Avoid Tourist Traps
Did you know that restaurants near tourist sites tend to be twice as expensive and half as good? These places know that tourists probably don't know any better and will rip people off by offering cheap quality goods at high prices. Avoid tourist traps by searching out great local places to eat and things to do.
Sure, you can still go see and do the touristy things (hell, I even love doing that every once in awhile), but don't get sucked into the traps surround the sites. Use the 6-block rule, Yelp, or Google to find other places to eat. Hint: If there are pictures of the food on the menu, you might want to think twice...
8. Use Public Transit
Public transit is the cheapest and one of the best ways to get around any city. You're paying way less than a cab or rental, and you get to see the city how locals see it! Google Maps makes it easier than ever to map out a route to your destination, so take advantage of this! You can get by with spending $2-10 per day by utilizing public transit wherever you go. I freaking love it.
9. Skip the Booze
Alright, so I know I'm going to lose some of you on this one...but hear me out! Alcohol is the biggest rip off and money suck when you're traveling. Trust me, I love a nice, well-deserved cocktail at the end of the day, just like any other person; but you will save SO MUCH money by skipping the booze when you travel.
Most places charge $10-20 per drink now, which can make a huge dent in your daily allowance very quickly. And what's the purpose? To feel a slight buzz (or maybe not even that if it's a shitty drink)? Why not spend that money on experiences or things that will help you create memories from your travels?
The Only Exceptions: (1) Obviously, if you're celebrating something and you want to have a drink, do it. Try to set a limit or budget before you start. (2) Take advantage of Happy Hours! HH is a great way to save on having drinks. (3) Buy alcohol from the liquor store or grocery store to save on the markup costs. You can make your own bevvies in the room at a much cheaper cost.
10. Search Out the Deals
If you haven't caught on already, I'm all about finding the deals. There are always deals to seek out when you travel! Restaurant specials, hotel deals, happy hours, museum discounts, etc. are always going on! Check out Groupon or Living Social, ask the concierge, ask people on social media, or even do a simple Google search for great deals happening around you. There are always special things to be found and ways to save money by just setting the intention to seek them out.
What are other ways you like to save money during travel? Comment below with more tips!
PS - See my favorite travel things that I can't live without here!
Similar Posts For You
10 Travel Books To Put On Your Coffee Table Now
It's time for you to bring some travel home so that you can spark your interest and find inspiration for your next journey. Check out these 10 travel books that you should put on your coffee table now!
10 Travel Books To Put On Your Coffee Table Now
One thing I love about travel is that you can find inspiration for it almost anywhere. I personally love adding little touches of that inspiration all around my home. What better way to do that than having a fabulous coffee table book to flip through when you're all cozied up?!
A great travel book could spark your interest to go somewhere new, show you places you've never seen before, or, at the very least, feed your soul's love and desire for the exotic destinations of this world. So if you're a travel junkie like me, grab a copy of at least 1 of these 10 inspiring travel books so you can bring a little travel home with you today!
Paris in color
Explore the colorful streets of Paris through this photographer's eyes. Every beautiful corner will definitely make you swoon!
The Best Place to be Today
Explore and know where in the world you should be on every day of the year. You could be spending 4th of July in NYC, or dressing up for Carnivale in Venice on the 15th of February.
36 hours series
This series of books goes through detailed itineraries of what you should do and experience in cities all around the world in a short amount of time! Great for weekend travelers!
Follow Me To
This unbelievable collection of images was shot by a lovely couple who wanted to remember their journeys around the world. Each photo is more stunning than last. #RelationshipGoals
The Travel Book
Get some serious wanderlust flipping through this book of every country in the world and see where you might want to travel next.
Humans of New York
Brandon Stanton became a household name after this incredible personal project where he went around and photographed New Yorkers while learning about their journeys. See and read about each of their unique stories in this book.
Ultimate travel
Explore 500 of the best places to see in the world according to the travel experts at Lonely Planet.
Places to go, People to see
I think I'm particularly drawn to this book's title because my mom always said that to me to get me out of the house fast! This adorable book is the perfect combination of inspirational quotes, old world glamour and photography, chic cities around the world, and ways to incorporate those travel experiences back home.
1,000 places to see before you die
Another book to spark your wanderlust. Each adventure will make you want to book that plane ticket ASAP!
Journeys of a lifetime
Explore 500 of the world's greatest trips that you should add onto your bucket list if they aren't already!
I also love having destination specific travel books by Fodor's, Lonely Planet, Rough Guides, etc. around the house! What are some of your favorite coffee table travel books? Comment below with other suggestions!
And just as a special bonus... Here are a few more of my favorites :) Happy reading!
